FIRST THE BAD BIT ..... January
21st 2006 There is a knock at the door and the
mailman is stood there with a HUGE parcel. It can only be
one thing... the TQ has arrived from Symulatory in Poland!
I have saved long and hard for this and of course I am really
excited. The Original Cost was 1270 euro's plus
shipping. So slowly I open the package in anticipation and
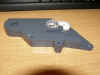
to my horror the TQ is damaged, i'm devastated. The no.2
throttle lever is broken and the TQ body does not seem to be
'square'. I also have ordered some replacement parts
which were broken on the last delivery and even these are broken
again. I am so angry and disappointed.
NOW THE GOOD BIT .... ALL's
WELL THAT ENDS WELL WOW I have
it working well and it looks the part too and it impresses the hell
out of everybody
who has seen it even real 737 pilots who come to play :o)

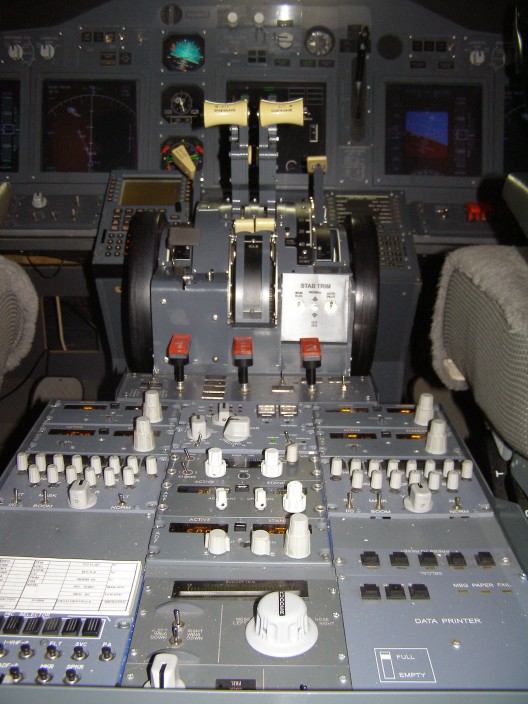
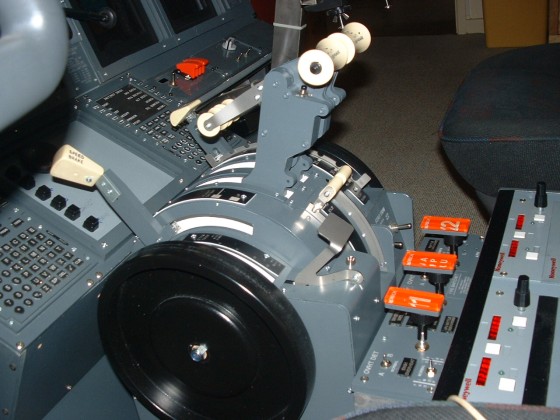
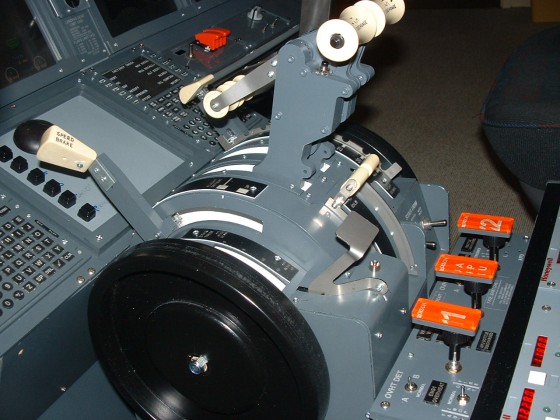
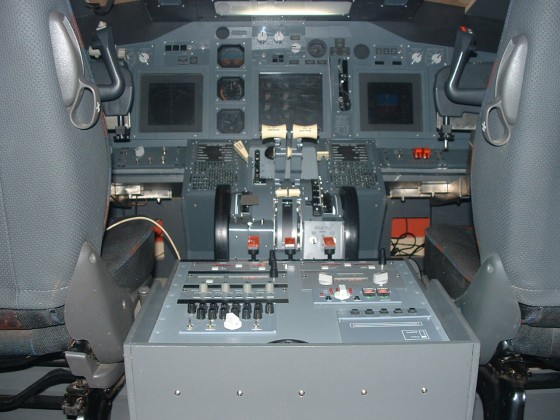
Simply click on a thumbnail
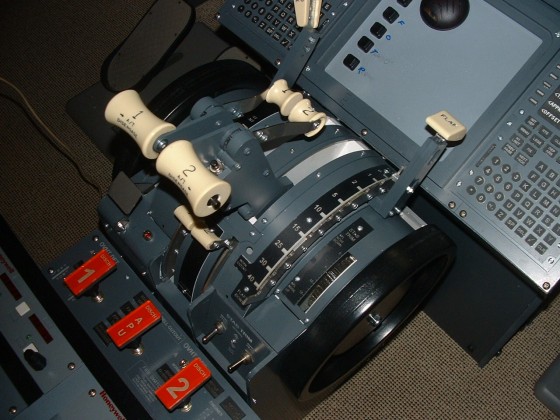
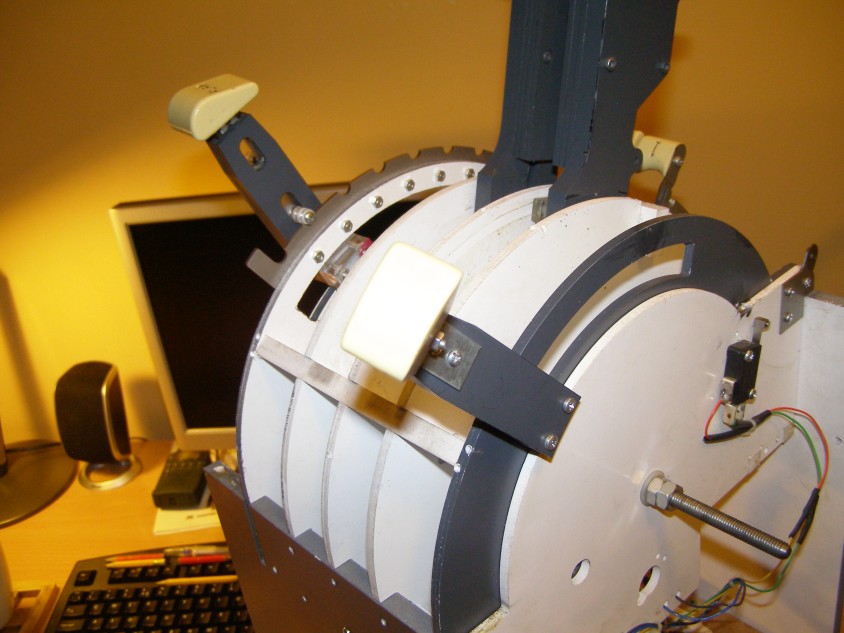
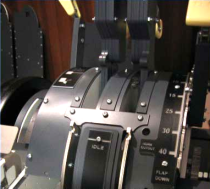
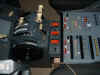
and we'll take a walk round it. OK, first and foremost we have a seperate
throttle for each engine. Keeps you on your toes when taxiing
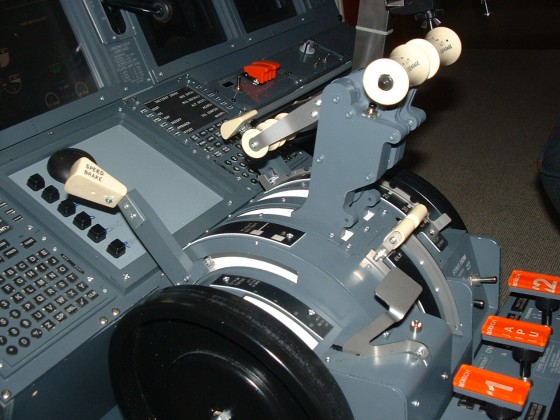
because of asymmetrical thrust. Then the Flaps
Lever is so realistic. You do have to spend a little time
setting it up for accuracy so that the amount of flaps set corresponds
with the detente. But that said, mine runs very accurately now
and the flaps deploy exactly where they have been commanded to.
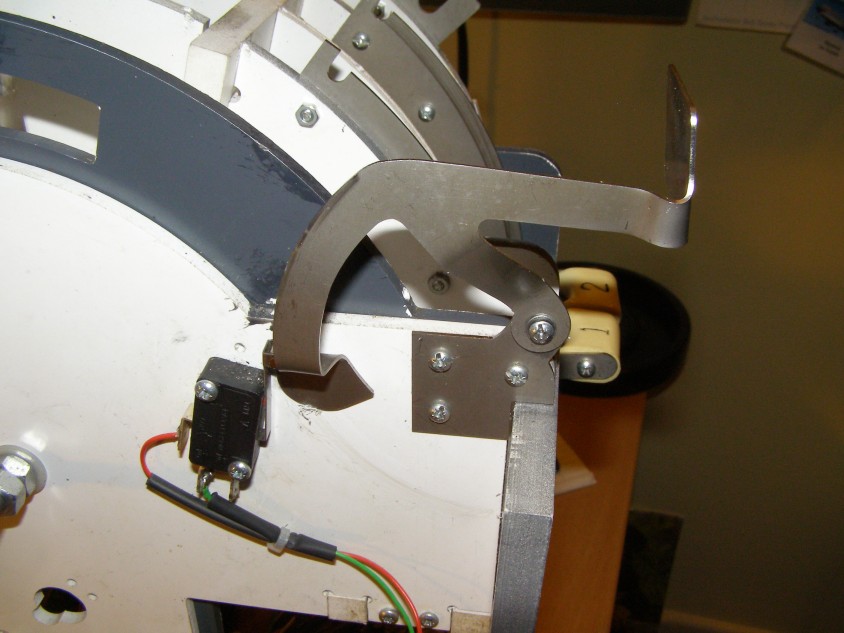
Thirdly is the Spoiler Lever, again some
accuracy is required here. I spent quite a bit of time getting
this accurate. First of all i played around with sensitivities
in FS and then 'fine tuned' the axis in FSUIPC. Now I can use
the Spoiler in flight and return it to the down position, no
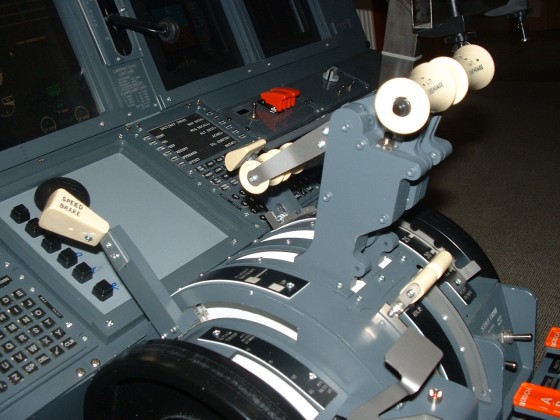
problem. The satisfaction on Landing and using the Thrust
Reverse Levers is great, especially when your Virtual
Co-Pilot in Flight Deck Live tells you 'Reverse Thrust Engaged' and
'Reverse Idle' - AWESOME.
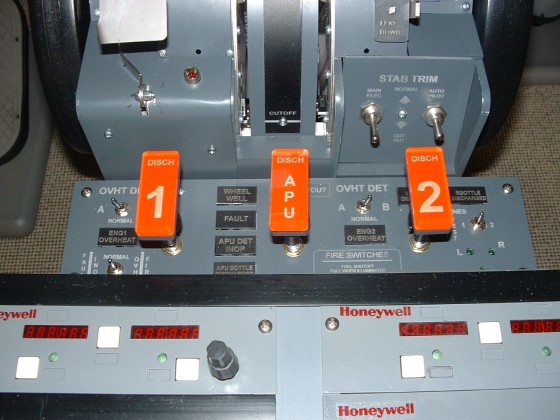
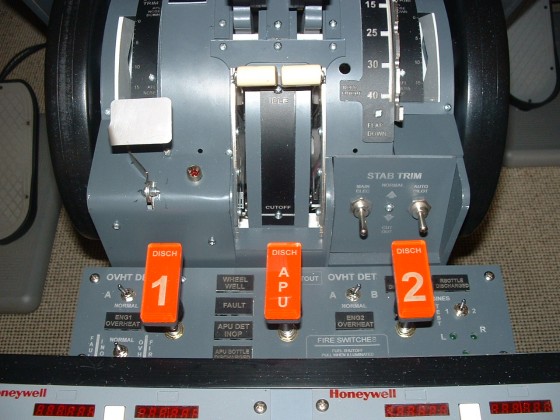
Add to this the fact that the TOGA, A/T Disconnect, Fuel Valves and
Parking Brake have been introduced into the cockpit as hardware
controls makes for a very realistic addition to the whole
experience. The CPFlight MCP and the SYMULATORY Throttle
Quadrant are the two most important purchases I have made.
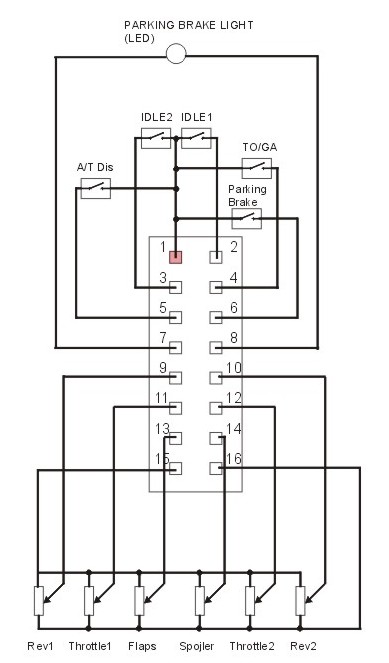
How it all works is quite simple really. Imagine your
joystick, it has several axes which are assigned to different
functions, the most common being the Ailerons, the Elevators and the
Throttle. Well these axes can be assigned to any of the
functions that require an axis to drive it. So, the TQ has
six potentiometers built into it. Each throttle lever has one,
each reverse thrust lever has one, the Flaps Lever has one and finally
the Spoiler Lever has one. Originally, i connected the TQ to the PC
via the Opencockpits Joystick Emulator. But sadly this card only
offers you 5 axes. A step by step guide on how to connect your
TQ using a Joystick Card is on the left.
Then I came across the BU0836
Controller from Leo BODNAR. This card in it's native state
can control upto 8 seperate axes and gives you the expansion of 32
extra joystick buttons and a Point of View Hat if you need it.
PLEASE
NOTE! If you use FSUIPC, it will only see the first 6
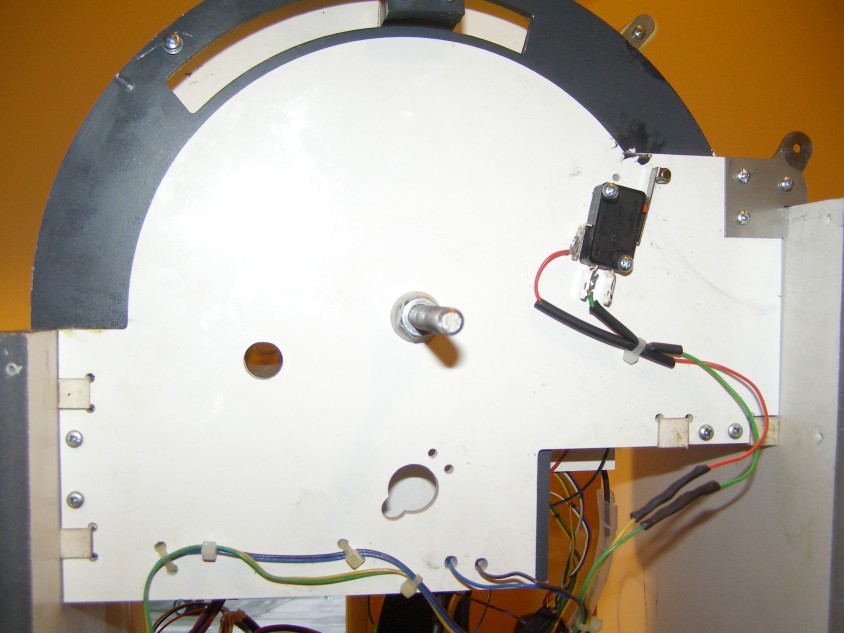
axes, but that's OK, it's all we need. I have built the
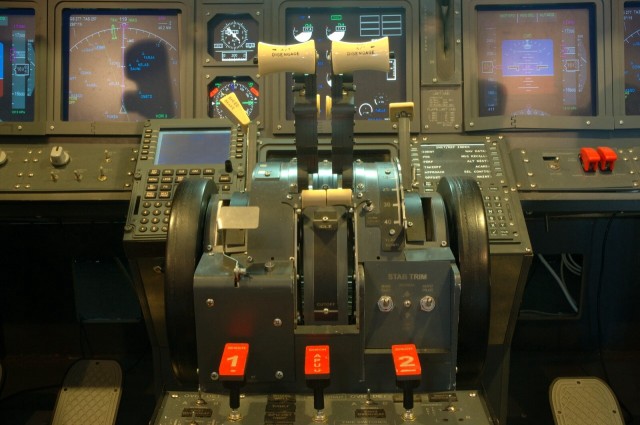
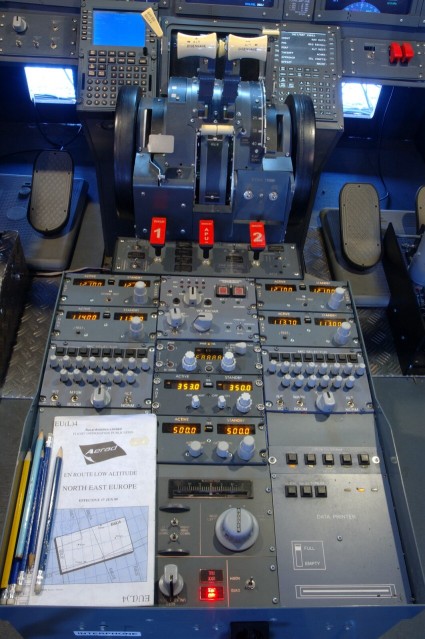
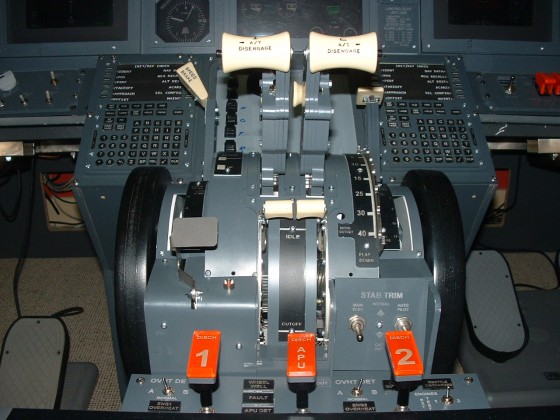
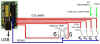
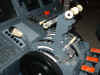
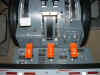
BU0836 card into the TQ and here's what it controls.......
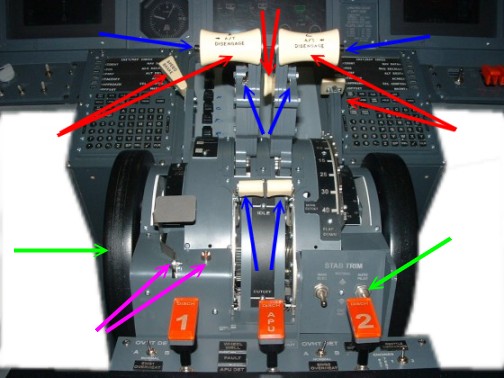
RED
ARROWS
are all axes and are assigned as follows:
No 1 is Throttle 1. X
Axis No 2 is Throttle 2. Y
Axis No 3 is Reverser 1. Z Axis
No 4 is Reverser 2. X Rotation No 5 is Spoiler. Y
Rotation No 6 is Flaps Lever. Z Rotation
All Axes have
been assigned and calibrated in FSUIPC
BLUE
ARROWS are all connected to the BU0836 Joystick Buttons Matrix. Then
the button is read in FSUIPC and then the command sent to the sim to
action that command.
PURPLE
ARROWS The
Parking Brake and the Annunciator are connected thru the CPFLIGHT
MCPEX1 which gives me an accurate On/Off state
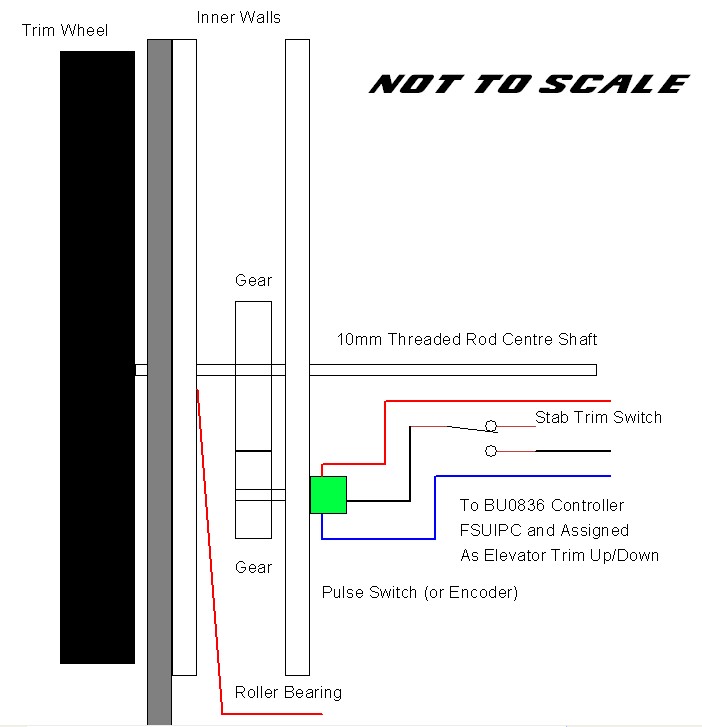
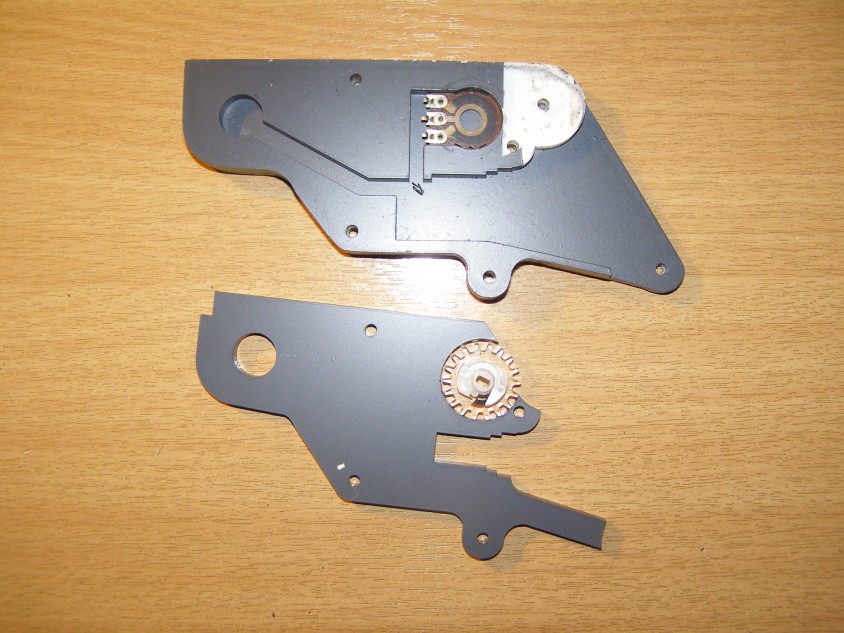
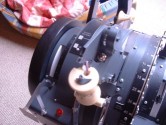
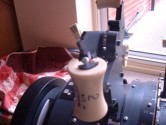
 GREEN
ARROWS Elevator Trim. is controlled by a clever little
component called a PULSE SWITCH. It is basically two rotary switches
in one and only contacts momentarily at each detente in the direction
of rotation. Connected to Leo's Joystick Card as two seperate buttons,
rotating it has the same effect as constantly pressing a joystick
button. In FSUIPC the buttons are assigned to Elevator Trim Up
and Elevator Trim Down. So rotating the trim wheel works.
Symulatory build in two gears on the trim shaft (one drives a rotary
encoder which i have replaced with the Pulse Switch). The wiring to
the Pulse switch is routed via the STAB TRIM switch to give me a Man
and Cut Out position. Also going to route the Yoke Trim Switches
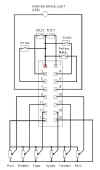
thru the other one, so i have Man Elec and Cutout. See the diagram. GREEN
ARROWS Elevator Trim. is controlled by a clever little
component called a PULSE SWITCH. It is basically two rotary switches
in one and only contacts momentarily at each detente in the direction
of rotation. Connected to Leo's Joystick Card as two seperate buttons,
rotating it has the same effect as constantly pressing a joystick
button. In FSUIPC the buttons are assigned to Elevator Trim Up
and Elevator Trim Down. So rotating the trim wheel works.
Symulatory build in two gears on the trim shaft (one drives a rotary
encoder which i have replaced with the Pulse Switch). The wiring to
the Pulse switch is routed via the STAB TRIM switch to give me a Man
and Cut Out position. Also going to route the Yoke Trim Switches
thru the other one, so i have Man Elec and Cutout. See the diagram.
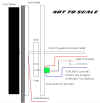
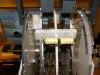
BACKLIGHTING Straight from the manufacturer, there is no provision for
backlighting. However i saw on a Norwegian Builders site a very
clever Idea. What he did was to use flexible striplights like
you see in cars. This is something I have investigated. In
the end I have used a couple of simple MES Bulbholders with 12v bulbs
powered from a simple PC Power supply (See the Components Page). 

AUTOMATION. I am
investigating the options open to me for automating the Throttle
Levers, Spoiler and Trim Wheels. At Present, the favourite
is PHIDGETS, but that could change.......(added
11th Sept 2009, EVERYTHING HAS :o))
)
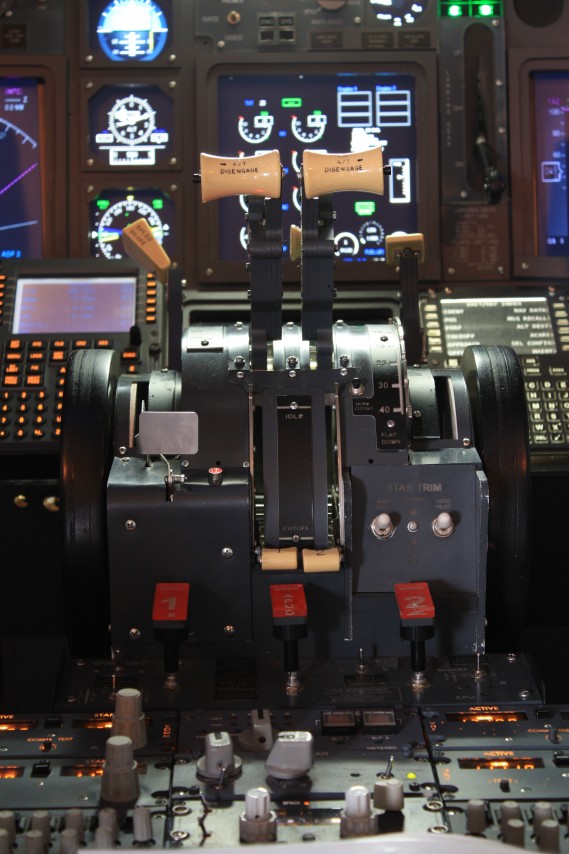
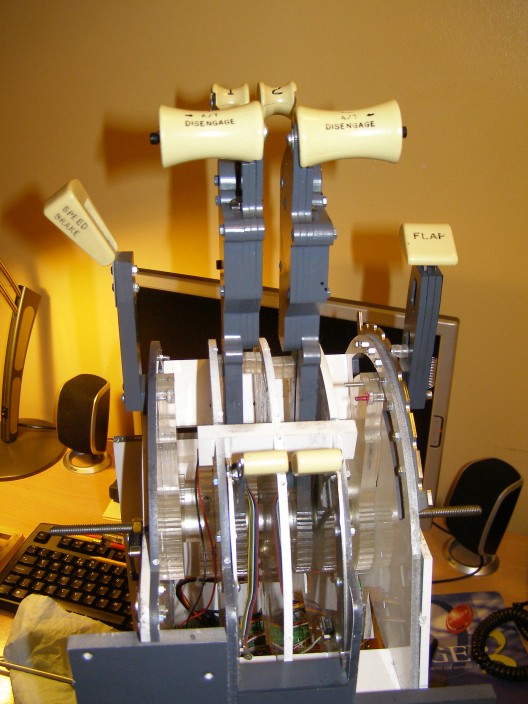
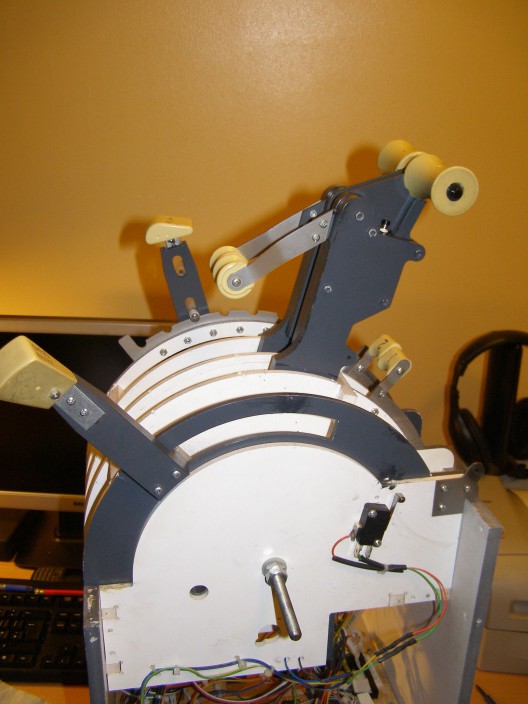
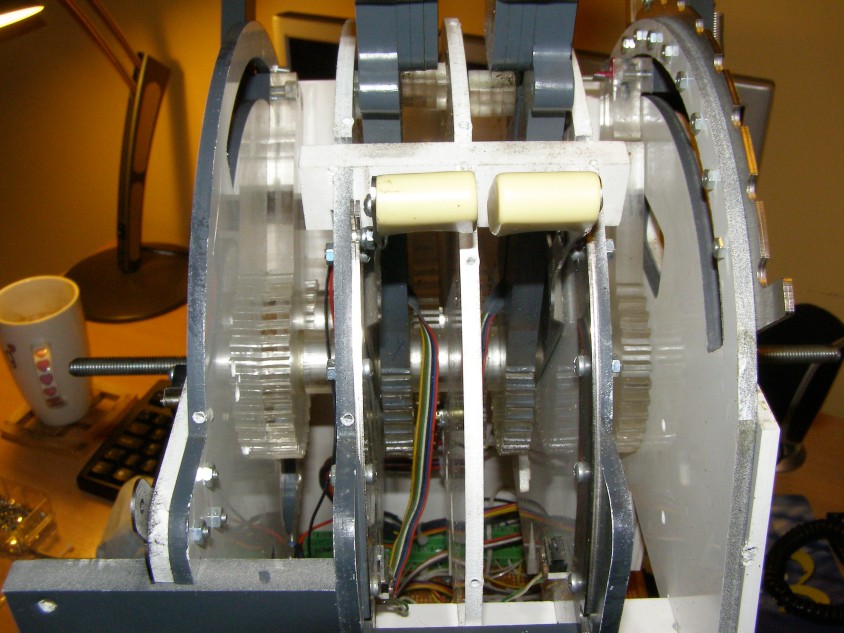
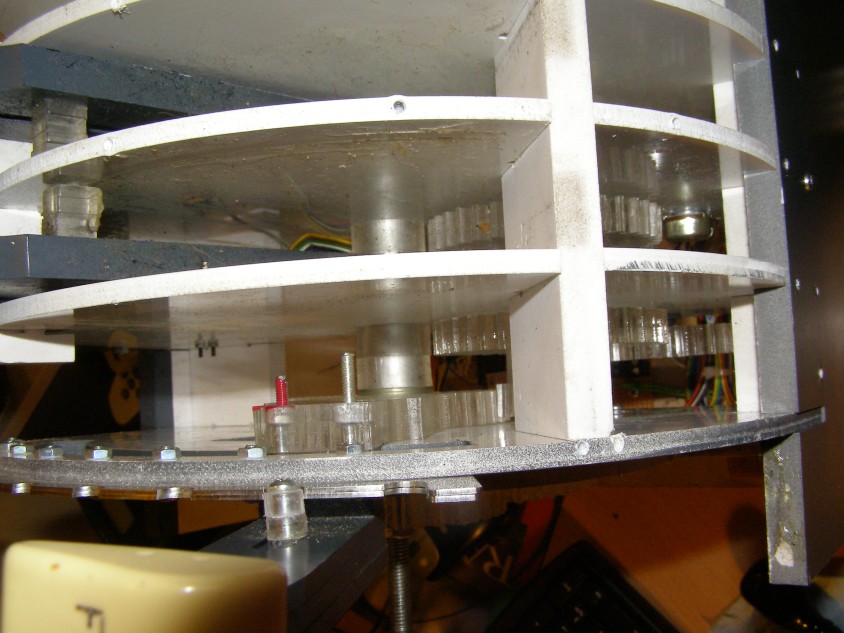
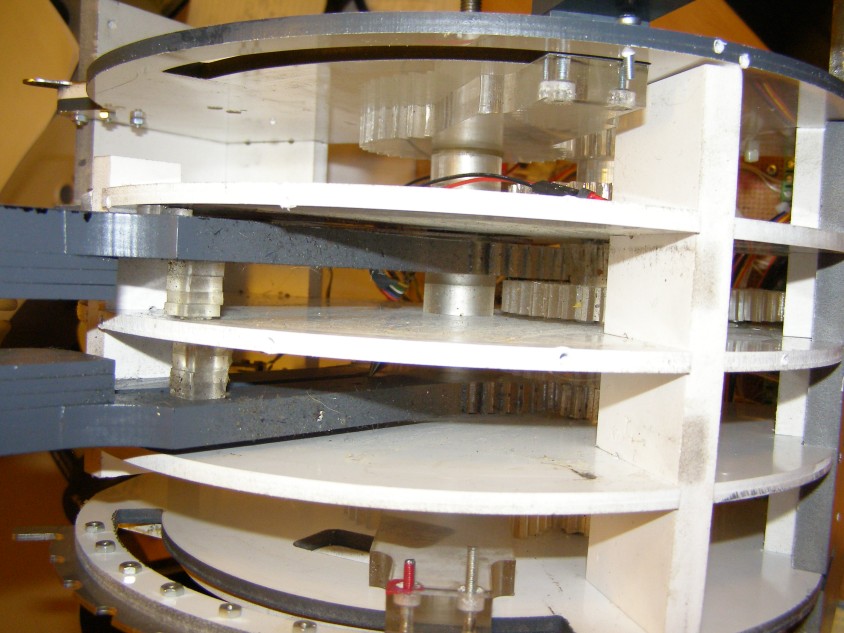
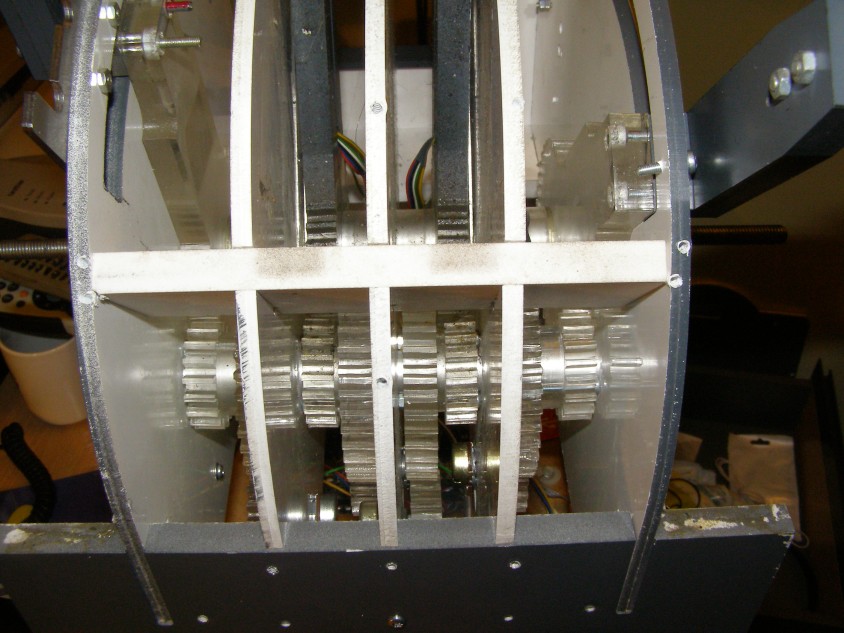
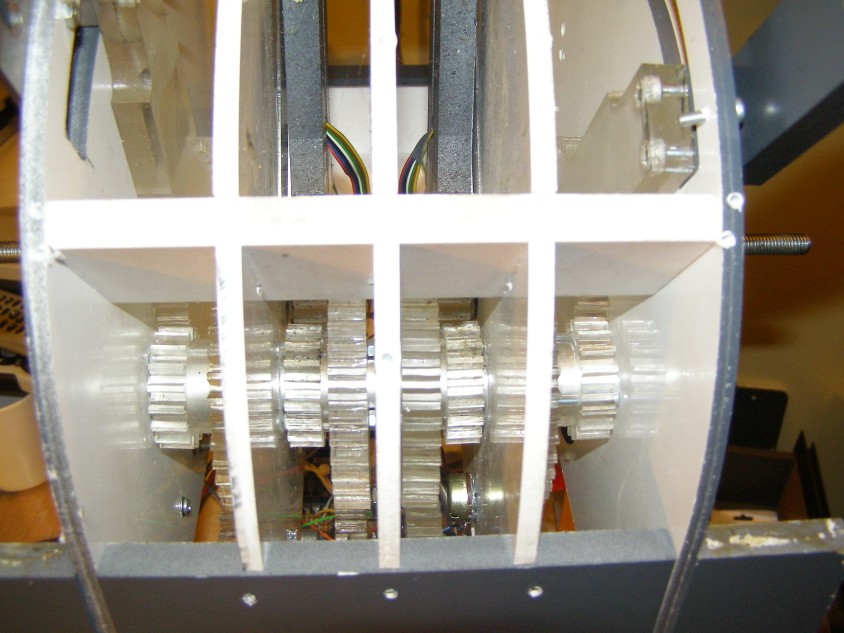
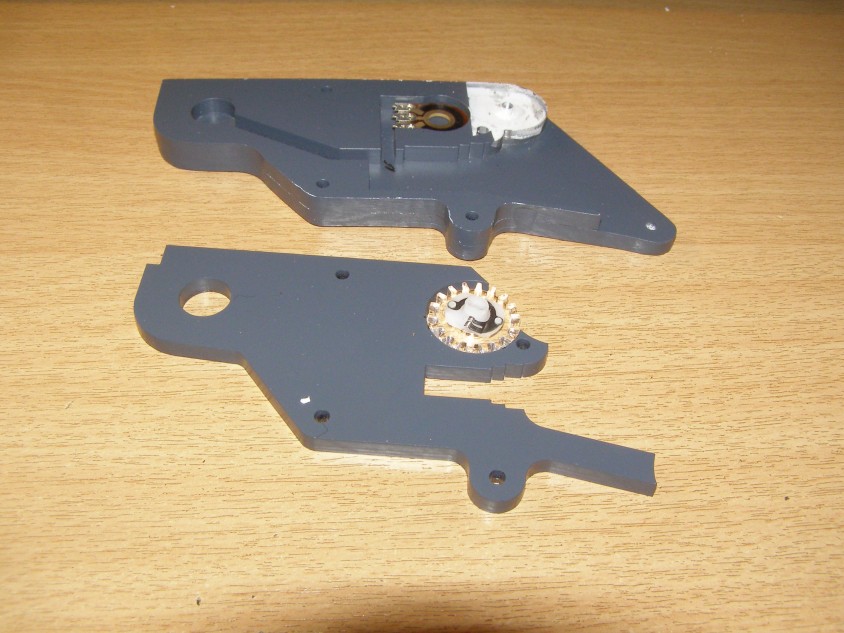
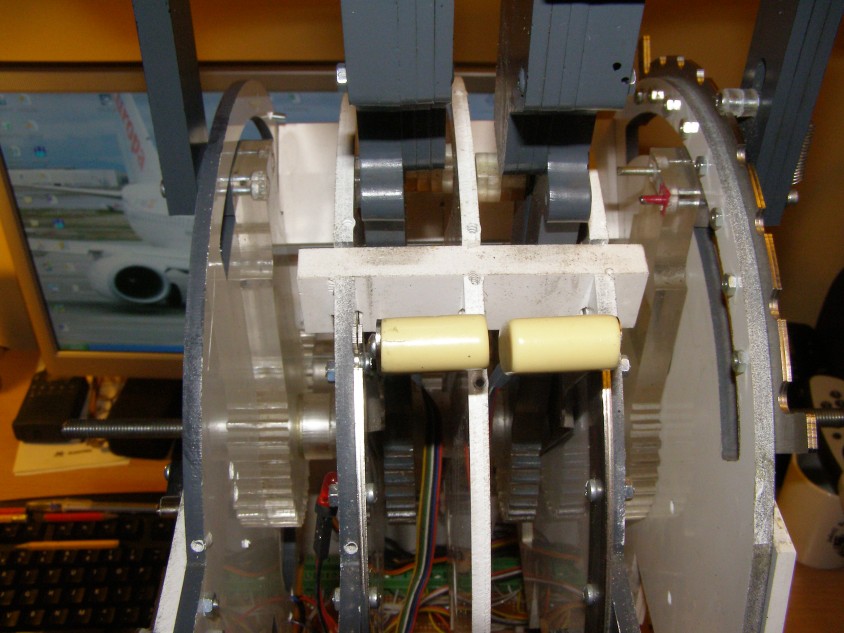
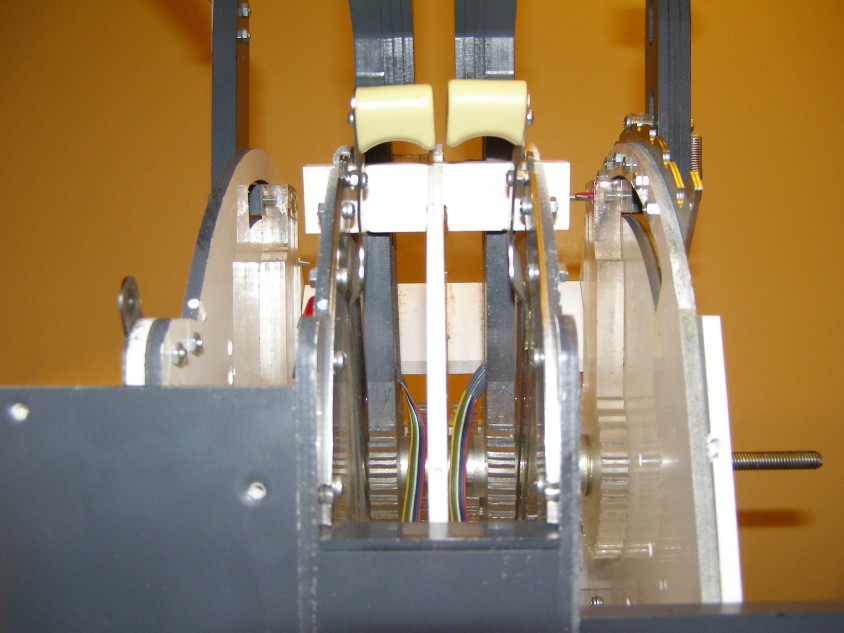
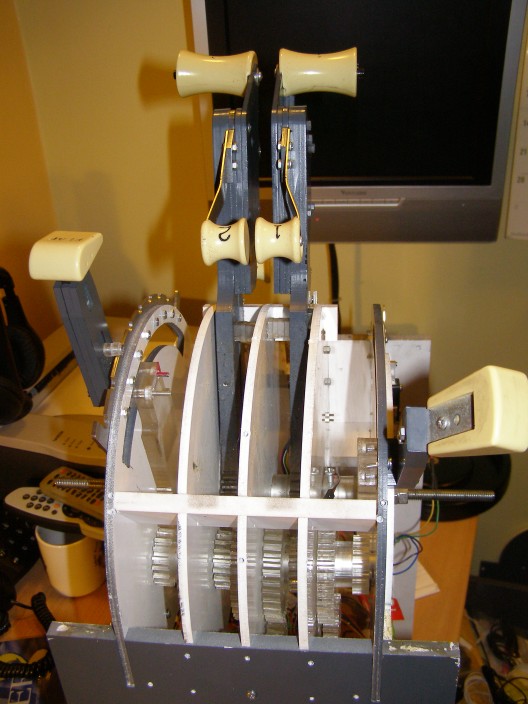
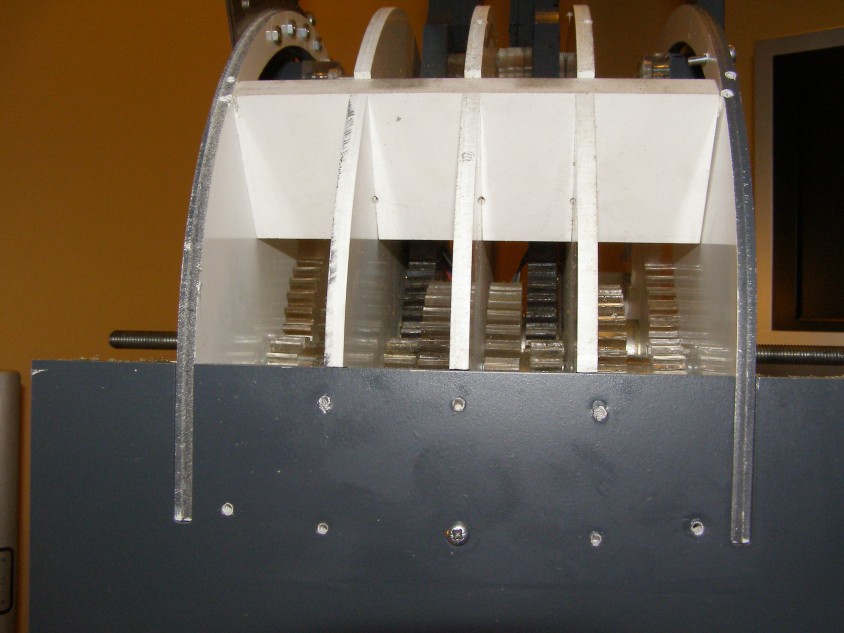
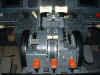
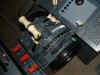
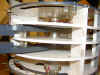
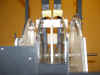
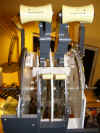
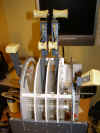
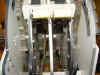
LET's
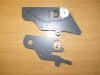
LOOK INSIDE IT
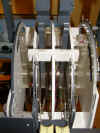
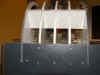
Ok, basically it has 5 inner panels held together by a series of
positioning blocks which are machined and jointed to hold the plates
in place. 4 potentiometers are situated inside the assembly for the
two throttles, the flaps lever and the spoiler lever. It's real
clever how it all fits together. 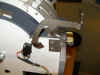


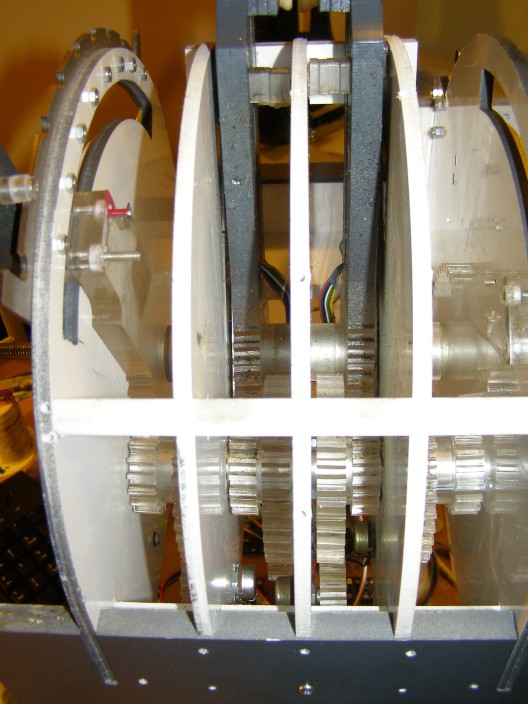
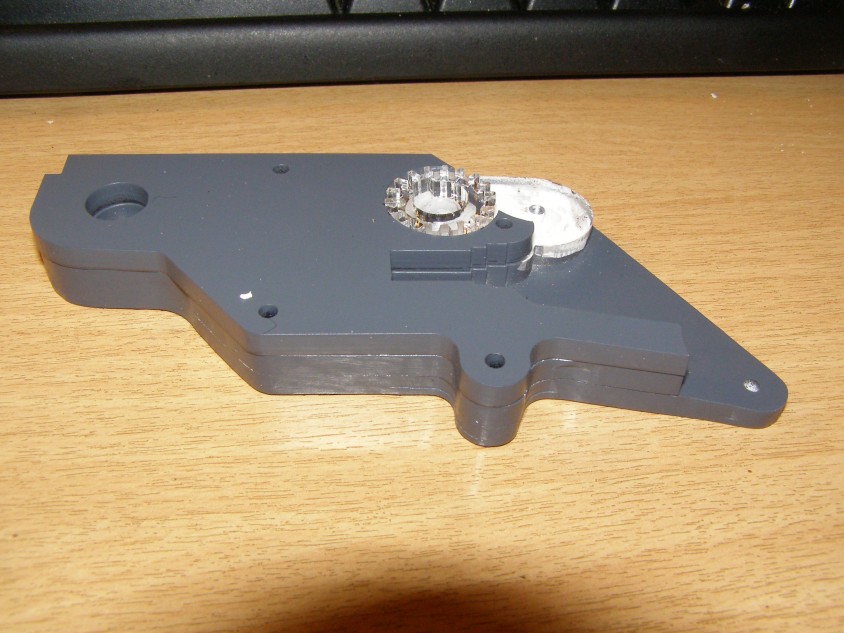
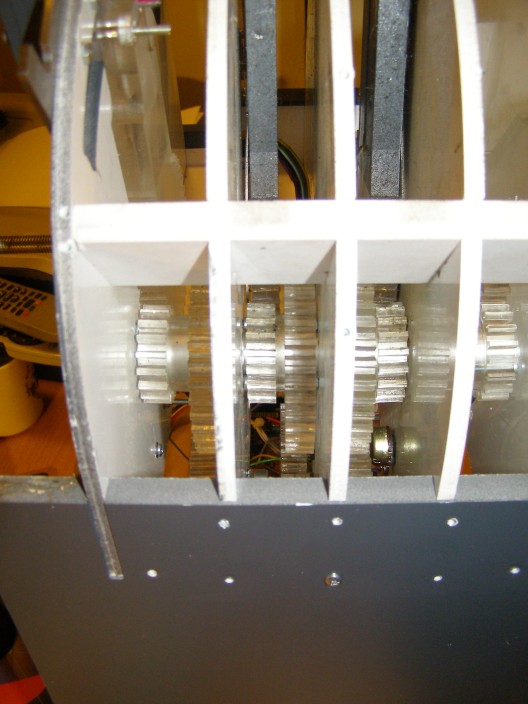
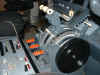
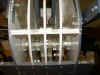
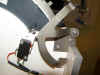
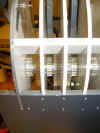
Thru
the centre runs a 10mm Threaded Rod. This is what the Trim
wheels bolt onto. It sits in two roller bearings inside the side
covers to support it either end. Now here's the clever
bit. The rod runs inside a polished steel tube onto which the
handles/levers rotate. A second tube is situated also inside the
assembly on which the idler or transfer gears rotate. 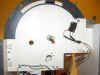

|
 HAVING
PROBLEMS WITH SYMULATORY? HAVING
PROBLEMS WITH SYMULATORY?
You are not alone. Sadly things in
Andrychow seem to have gone from bad to worse. Several colleagues
have been telling me about their bad experiences and they read
like a Horror Story. If your email is ignored try this
one:
biuro@symulatory.com
or here's the phone no. 0048338753776
and if that doesn't work here's their address:
JAKUB GAIK
ul.Żwirki i Wigury 2
34-120 ANDRYCHÓW
POLAND
|
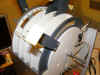
SYMULATORY
Throttle Quadrant.
I have the USB version. This controls
the various operations by the use of axes. For full
functionality, you need 6 axes as follows.....
1. No 1 Throttle
2. No 2 Throttle
3. Spoiler
4. Flaps Lever
5. 2 Thrust Reversers.
and 4 buttons for....
Capt.& F/O TOGA Buttons (tee'd)
Capt.& F/O A/T Disconnect (tee'd)
No.1 Engine Fuel Valve
No.2 Engine Fuel Valve
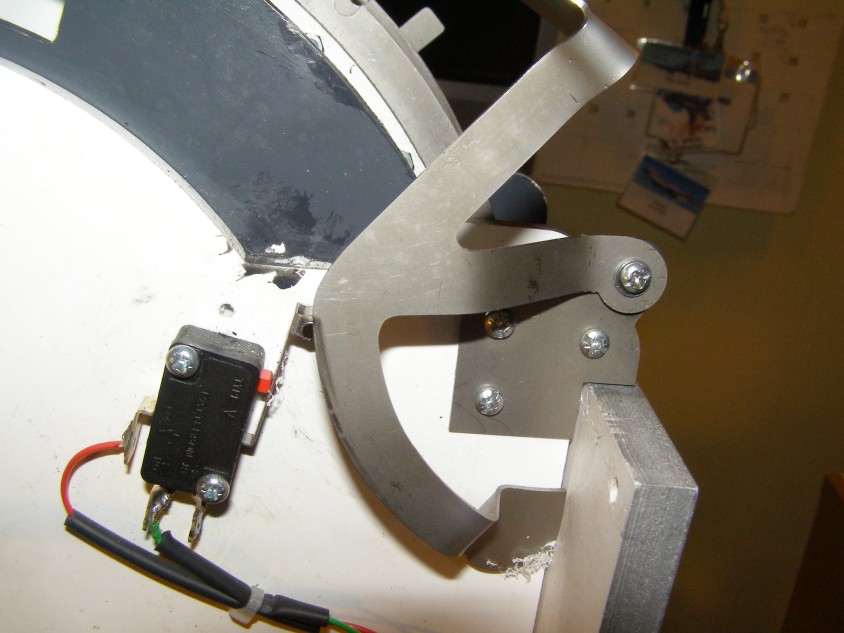
In FS the Parking Brake is a toggle, so it
just reverses the state of the Parking Brake. I have actually
wired this switch thru the CPFlight MCPEX board so that i have
an ON and Off state and used one of the outputs to give me the
Indicator Lamp. But for those who don't have this
function, i suggest fitting a second micro switch to allow an
On/Off state to be obtained in FS.
First of all I deleted the axes assignments in FS2004 then
assigned and calibrated them finally in FSUIPC.. The result
is very good. The throttles are very responsive from the rest
position. The Spoiler reacts exactly where the indications
are on the Quadrant Housing and most accurate is the Flaps Lever
which deploys the correct amount of Flaps at the Correct detente
in both the extending and retracting directions. Fine tuning
does take a little bit of 'pissing' about with, but it sure as
hell is worth it.
Symulatory
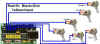
TQ Wiring Diagram
PMDG737
Idle/Cutoff Levers
I've discovered that it
is possible to accurately control the Idle/Cutoff Levers on the
PMDG by manipulating the offsets. These levers respond to
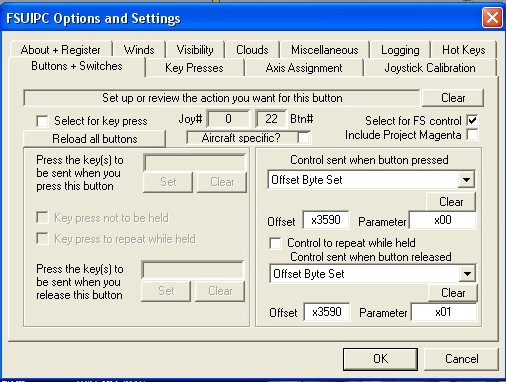
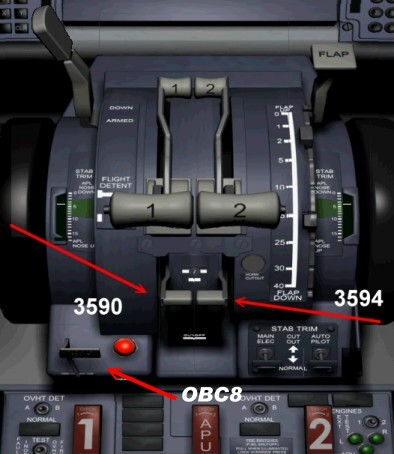
the FS commands for the Fuel Valves. in the FSUIPC Buttons and Switches Menu, in the FSCONTROL dropdown Menu is an item Offset Byte Set. this is where it's at. the
offset for Eng 1 Fuel valve is 3590 and for the Eng 2 Fuel Valve is 3594 (don't know if this works with the 747, but Eng 3 is 3598 and Eng 4 is 359C). setting the parameter (based on your switch) will give you an accurate on/off state of the levers. parameter 1 for valve open and 0 for valve closed.
This only works with continuosly on switches (toggle or microswitch) and not with pushbuttons i'm afraid.
Simply select your button or switch and let FSUIPC identify it. select the Offset Byte Set item, change the
ofset to x3590 for eng1 (or the offset for the engine valve you want to control) and put a zero in the parameter box if you want the valve closed when the switch is closed (or vice versa). then go down to the 'when button released' section and reverse the parameter.
See HERE
PARKING
BRAKE...(added 24/12/2008)
The same technique used on the fuel valves (in FS9.1) can also be
applied to the Parking Brake using Offset 0BC8. Parameter 1 = Parking
Brake On, Parameter 0 = Parking Brake Off :o))
|
|