|
23rd August 2006.
.pdf
file 'How to Setup and Configure the USBKeys Card in words of One
Syllable' amended at bottom of column 1. 31st
Jan 2008 .pdf update file added to
allow the use of permanently on switches.
OpenCockpits is a group of Spanish Cockpit Builders and Flight Sim
enthusiasts with some very clever ideas. They have developed a range
of Control Boards and their own cockpit control system.
From their range, these have got to be 2 of the most useful circuit boards I have come
across.
Ordering is easy and delivery was very quick. Communication is
also excellent with a mail telling you how your order is progressing
at each stage. WELL DONE GUYS !
THE Positive Side.
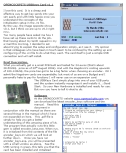
First thing is the cost/performance formula. At 24 euros (plus
shipping), this is an amazing cost effective way of getting commands
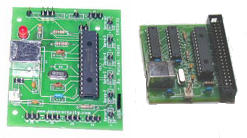
into the sim using hardware switches. The USBKeys
card (right) is just simply a Keyboard Emulator which does exactly what it is
supposed to do. Connects to any free USB Port either directly or
thru a hub. By using a Matrix connection system of 11 x 8
contacts,
it allows you to emulate 88 either single or combined keystrokes (inc.
ALT +, SHIFT + and
CTRL +). Connection to the Card is via a 40 wire standard data ribbon
cable. You do need to pay special attention to the
manual to ensure you correctly identify each connection,
because they are in 2 groups (letters and 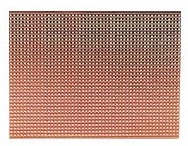 numbers
- THEY ARE NOT CONSECUTIVE). This amazing little card uses a small configuration
program which can be auto run by FSUIPC or WideFS when you start your
Flight Sim. Assigning keystrokes to each matrix
combinations is very easy (once you get your head around the manual) and can be done quickly using
Notepad. And the use of several cards is possible
because each card is assigned a recognition number, so bridging A
& 4 on one card will give you a different keysend than by bridging
the same combination on another card.....all clever stuff :o).
But the USBKeys card can only be used for single keysends. It
does not repeat the keysend when the contact is held on, neither by
itself or thru FSUIPC. So using this card is only
advisable for single functions such as Light Switches, Starters or
Pushbuttons on your Auto Pilot. numbers
- THEY ARE NOT CONSECUTIVE). This amazing little card uses a small configuration
program which can be auto run by FSUIPC or WideFS when you start your
Flight Sim. Assigning keystrokes to each matrix
combinations is very easy (once you get your head around the manual) and can be done quickly using
Notepad. And the use of several cards is possible
because each card is assigned a recognition number, so bridging A
& 4 on one card will give you a different keysend than by bridging
the same combination on another card.....all clever stuff :o).
But the USBKeys card can only be used for single keysends. It
does not repeat the keysend when the contact is held on, neither by
itself or thru FSUIPC. So using this card is only
advisable for single functions such as Light Switches, Starters or
Pushbuttons on your Auto Pilot.
Click on the link to find out more about the USBKeys
Card or click HERE
to download the manual.
The Down Side.
Well for 24 euros, what do you expect? But the down side is so
insignificant that it does not really matter if you think about how
you are going to connect up to the card.
1. The Opencockpits
USBKeys card will send the key or key combination only once. It
does not repeat while the contact switch is held on. This makes
it ideal for most commands within the sim, but you cannot assign it to
functions which need a repeat key command like trim etc.
2. If you want to use
permanently on switches, you have to use a diode in the line to
prevent continuity loopback. That is for example if you have
several switches on, when you throw another one, it is possible for
the circuit continuity to find a different route back to the card
which causes erroneous switching. Below and to the left is
plenty of information which is going to help you get this gem working. USING The OPENCOCKPITS
USBKeys CARD
This card is amazing. Remember that all controls within the
sim are actioned by either a keystroke or a mouse click. How this card
works is like this. You have a matrix of 11 Letters and 8
Numbers, so by connecting a number and a letter combination, a particular
keysend can be generated. These keysends can be configured to suit
your own requirements by simply editing the .ini file. So it
follows that you will have 88 separately configurable keysends at your
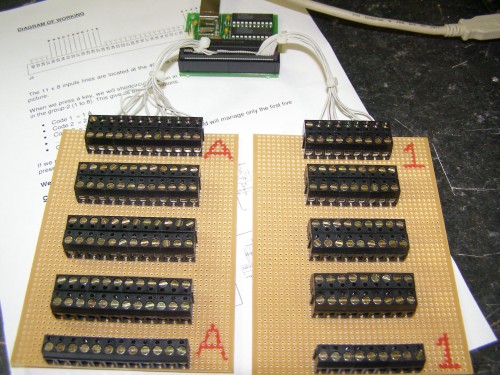
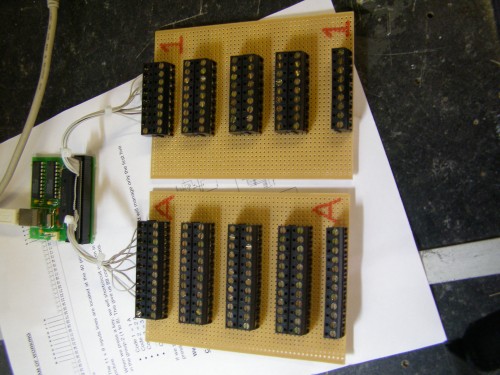
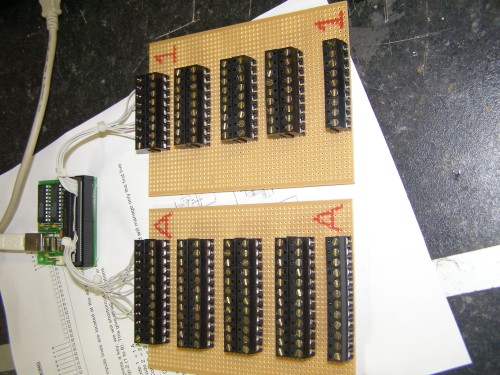
disposal. So i used a strip board to build the Matrix Break-Out
board. 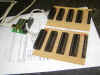 Using toggle and rotary switches it then became possible
to action a
keysend by the use of a hardware switch. I have used the USBKeys
Card to give me accurate switching on several circuits within
the 'PIT' by sending these keystrokes either direct to the
Simulator itself or by assigning them an action thru Pete Dowsons FSUIPC. Pete allows you to
'Map' keystrokes to actions within MSFS. So by utilizing unused
keys, you can assign these to perform exact actions within your
simulator. Using toggle and rotary switches it then became possible
to action a
keysend by the use of a hardware switch. I have used the USBKeys
Card to give me accurate switching on several circuits within
the 'PIT' by sending these keystrokes either direct to the
Simulator itself or by assigning them an action thru Pete Dowsons FSUIPC. Pete allows you to
'Map' keystrokes to actions within MSFS. So by utilizing unused
keys, you can assign these to perform exact actions within your
simulator.
First decide what keys you want to map. I
started by choosing the free key commands I wanted to assign. Go into your FSUIPC
Keys Menu and assign them to functions that you
need. Restart your FS and test the keystrokes.
With the PMDG, I found that these worked (they will also work
with stock FS Aircraft and Other Add-Ons)
Engine 1 Autostart (wired to Overhead No 1 Start Switch)
Engine 2 Autostart (wired to Overhead No 2 Start Switch)
Strobe Off
Strobe On (Wired to DP On/Off Switch to give on & off)
Landing Lights Off
Landing Lights On (Wired to DP Switch to give on/off)
There are other functions you can use as well. Nobody's
setup is exactly the same as anybody else's. How good is your
imagination.
 Click
on the Image for a more 'IN DEPTH' look at using the USBKeys Card and
assigning keys and key combinations. Click
on the Image for a more 'IN DEPTH' look at using the USBKeys Card and
assigning keys and key combinations.
Also ideas on
how to direct those Keysends thru third party modules like FSUIPC. Any
new ideas welcome
|
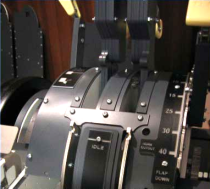
The Second card I have used in the past is the JOYSTICK Axes Card
shown here on the left.
This card lets me add upto 5 analogue axes and 24 extra buttons,
but these have now been replaced with Leo Bodnar's BU0836X cards
which give me greater connectivity.
The system recognizes the card as a Joystick which of course
allows me to assign these axes to for example Flaps Setting,
Spoiler, Reverse Thrust or Throttles.
Because the system recognizes the card as a joystick, using the
Game Conrollers Calibration Utility in XP, it is easy to set up
and identify the Axes/Buttons. Function assignment is then
pretty straightforward using either FS or FSUIPC as you would
with a normal joystick.
Click HERE
for more information on the JOYSTICK Axes Card or here for the Manual
USING THE USBAxes
Card on The TQ.
CLICK
HERE for a .pdf file of how to
set up and control your TQ using the Opencockpits USBAxes
card

To Visit OpenCockpits Click HERE
Controlling
PMDG Overhead With Hardware
*** 01/09/2008 Everything has changed with the introduction of
Pete Dowson's Mouse Macro Technique and this method is no longer
used. However i have left it in because several colleagues are
still using this method ***.
And as a further benefit, some Panels and Aircraft within FS only
allow the use of mouse-clicks to action a command or 'toggle' a
switch. I was faced with the problem of How To Make My Hardware
Overhead Panel integrate and Control the PMDG Overhead. For
example....when i turn on my engine generator switches, how do i get
the PMDG switches to turn on. Well the answer was staring
me in the face.

How I did it was to use Luciano Napolitano's
Utility Key2Mouse which you can get from www.wideview.it
. This utility allows you to map mouse-click hotspots and
translate them into a keystroke. 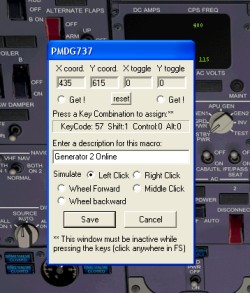
Now
we are cookin'. Every switch on the PMDG Overhead (or any other
of the PMDG Panels like Radio, FMC etc for that matter) is now
accessible and can be controlled with a hardware switch or push
button.
The switch is connected to the USBKeys card Matrix at a given
address and the keysend assigned in Key2Mouse is allocated to that
address. Now every switch on my Overhead that i need for control
within my PM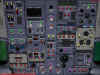 DG does exactly what it does within the PMDG. At present I
have 14 switches configured and assigned. These are the main functions
i require. I am now looking for free keysends within FS, FSUIPC
and the PMDG to expand the range of control. And
with 'Artistic' Switching of the Power to LED's, all the right lights
come on at the right time. DG does exactly what it does within the PMDG. At present I
have 14 switches configured and assigned. These are the main functions
i require. I am now looking for free keysends within FS, FSUIPC
and the PMDG to expand the range of control. And
with 'Artistic' Switching of the Power to LED's, all the right lights
come on at the right time.
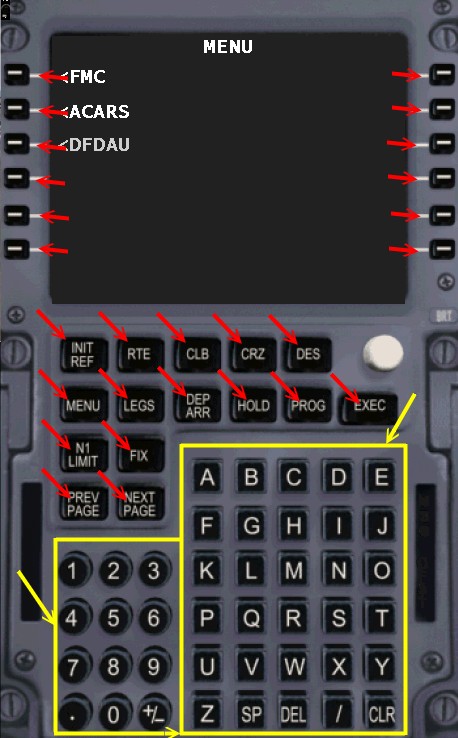
And it doesn't end there either. Control of the CDU/FMC is 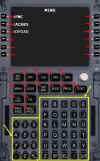 now
also possible using the same technique. Today (March 12th 2006)
i am working on the Prototypes with great success. now
also possible using the same technique. Today (March 12th 2006)
i am working on the Prototypes with great success.
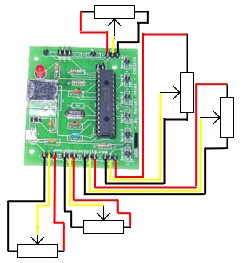
Click on one of the images to see a full scale representation of what
i have working right now. Red arrows have been connected and function.
Yellow arrows will be connected this week (in fact at time of writing,
I have the numeric keys on the CDU working). Purple arrows are
'animations' only as far as i can see and I will leave them until last
to save wasting key commands. Green arrows again will be left until
last because of reduced functionality within the PMDG.
|