|
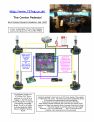
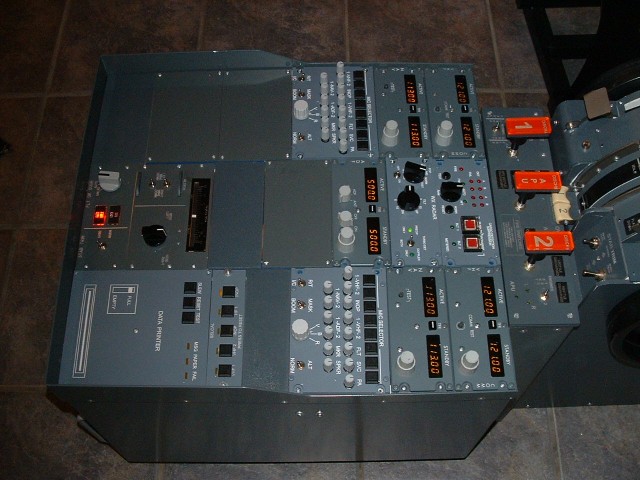
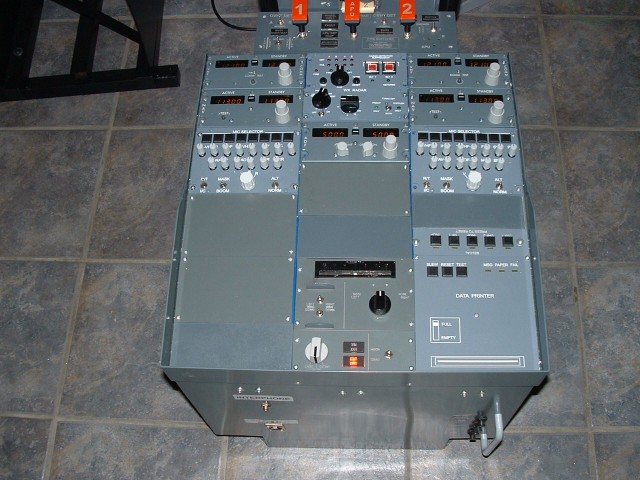
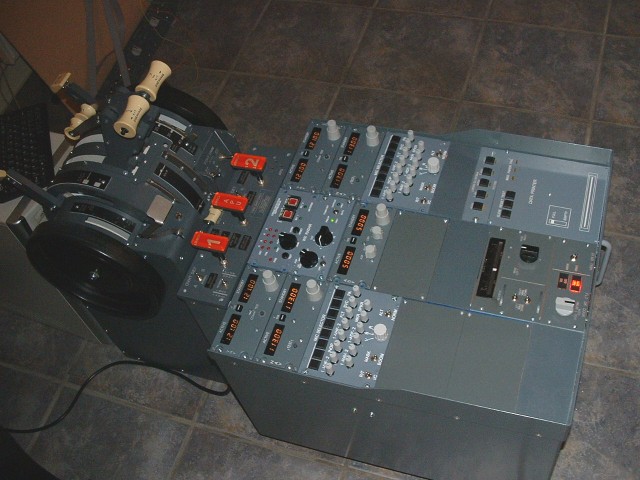
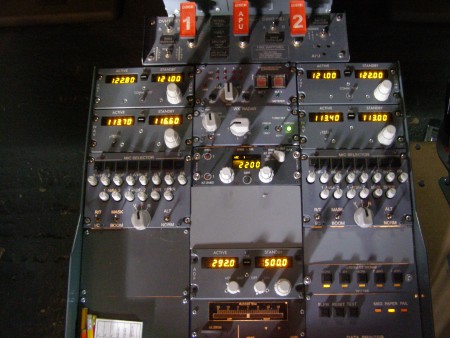
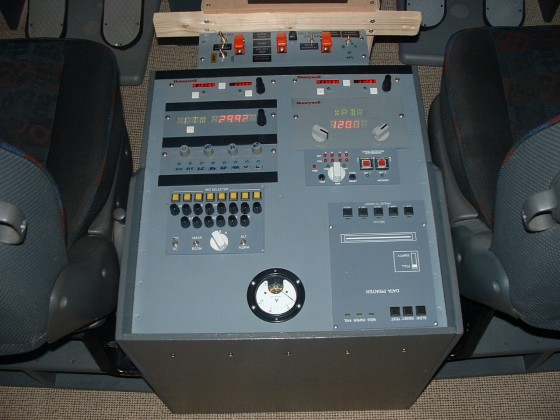
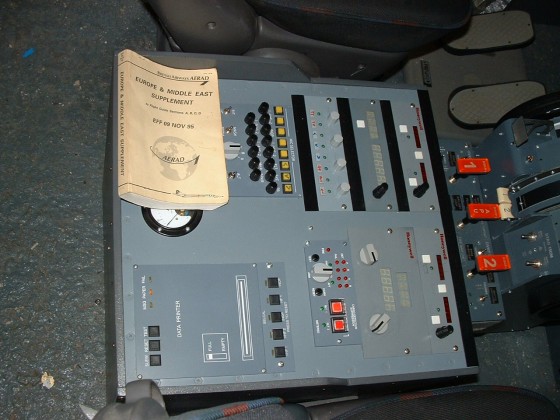
 This
is the finished article. Since getting
the Aluminium Pedestal first week of December 2006, i have spent the
time, wiring up and building the units into the pedestal. The photo doesn't do it justice-you have to
see it. This
is the finished article. Since getting
the Aluminium Pedestal first week of December 2006, i have spent the
time, wiring up and building the units into the pedestal. The photo doesn't do it justice-you have to
see it.
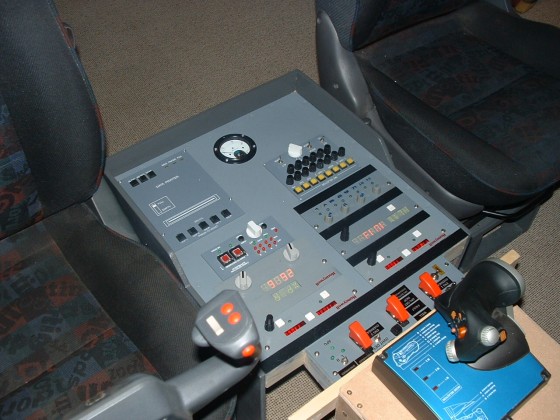
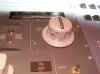
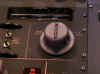
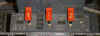
BOEING Style Knobs
came from Dieter Jakob at ROUTECH
in Romania
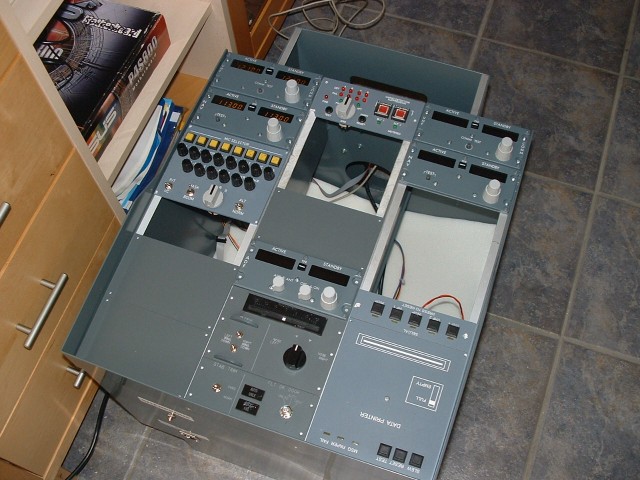
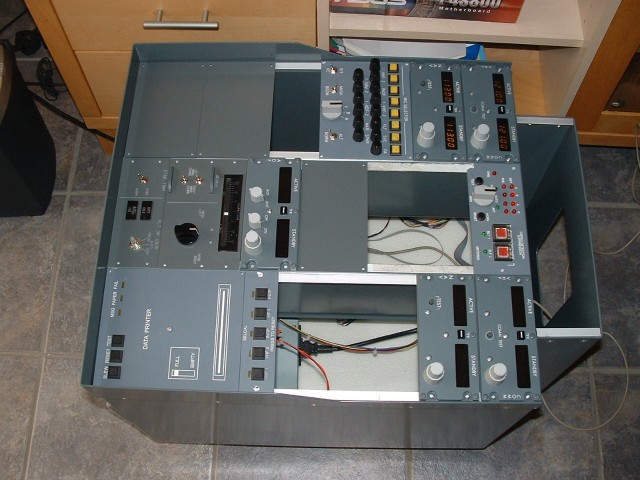
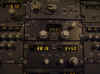
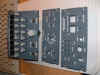
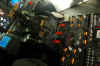
Everybody has to start
somewhere, so here's a couple of shots of my original Pedestal with a
home made fire panel. 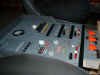
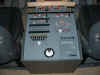
 
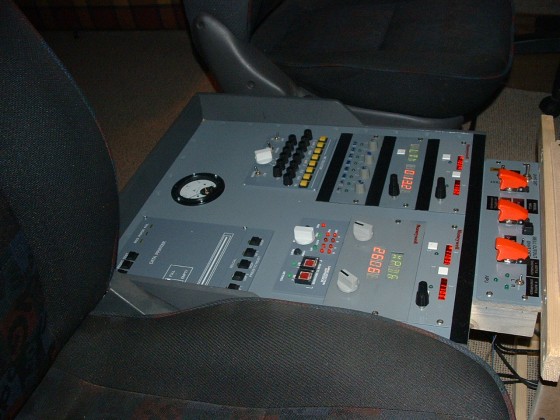
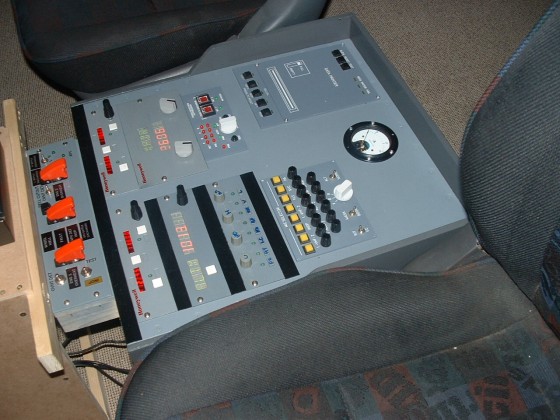
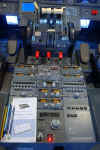
The 'Real' Pedestal itself was sourced from LAUSITZ
AVIATION. I just can't tell you how high quality it is.
I am so pleased with it. It's a full aluminium construction both
rivetted and welded for extra strength. The 3 bays are each
145mm wide with a dividing wall and an aluminium support lip each side
the bay for you to drill and tap into for fixing your panels.
I Started by drilling and tapping for 4mm bolts, but i found that no
two company's panels were made with consistent fixing holes, so i have
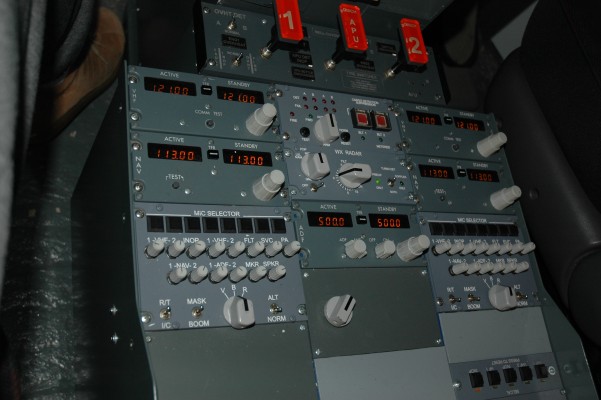
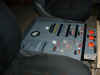
ended up using Stainless Steel 'Self-Tapping' Screws - Nice. 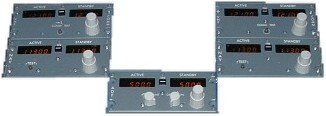 Radios
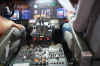
These have been supplied by Mark at FLIGHT
ILLUSION. They are faithful replicas of the GABLES units
used in the 737NG. I have installed the COM1 and COM2 VHF units,
the NAV1 and NAV2 units and the ADF as ADF 2. These
units are connected to a small control board which itself is
USB2.0. it also needs a 5 and 12v d.c. supply and is
conveniently fitted with a Molex Socket so you can plug a PC ATX Power
Supply into it. Simply load the drivers and the setup program and you
are ready to configure. From turning on your PC to actually
setting the radios in FS took me 15 mins - EASY PEASY :o) They
are self 'backlighting' so that's another problem we don't have to
worry about. Radios
These have been supplied by Mark at FLIGHT
ILLUSION. They are faithful replicas of the GABLES units
used in the 737NG. I have installed the COM1 and COM2 VHF units,
the NAV1 and NAV2 units and the ADF as ADF 2. These
units are connected to a small control board which itself is
USB2.0. it also needs a 5 and 12v d.c. supply and is
conveniently fitted with a Molex Socket so you can plug a PC ATX Power
Supply into it. Simply load the drivers and the setup program and you
are ready to configure. From turning on your PC to actually
setting the radios in FS took me 15 mins - EASY PEASY :o) They
are self 'backlighting' so that's another problem we don't have to
worry about.
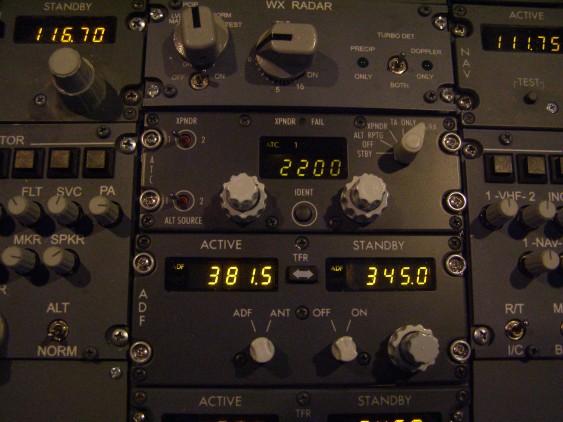
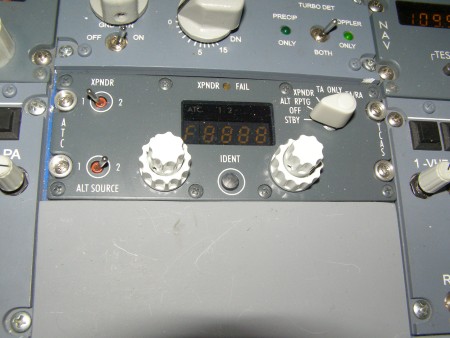
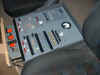
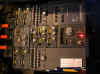
 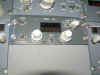 Transponder & ADF 1 came from
CPFLIGHT. I ordered a Flight Illusion Transponder in Nov 2006
which was promised for March 2007 delivery, but never materialised.
At the time of writing Flight Illusion are still not making a Gables
Transponder. So it's off to my mate Paolo at CPFlight.
CPFlight are so customer focused, it's a pleasure to deal with
them. I also bought a second ADF which when it arrived was
fitted as ADF1 because the operation is much nicer and the CPFlight
ADF actually operates the Ident function where the Flight Illusion
Radio does not. Transponder & ADF 1 came from
CPFLIGHT. I ordered a Flight Illusion Transponder in Nov 2006
which was promised for March 2007 delivery, but never materialised.
At the time of writing Flight Illusion are still not making a Gables
Transponder. So it's off to my mate Paolo at CPFlight.
CPFlight are so customer focused, it's a pleasure to deal with
them. I also bought a second ADF which when it arrived was
fitted as ADF1 because the operation is much nicer and the CPFlight
ADF actually operates the Ident function where the Flight Illusion
Radio does not.
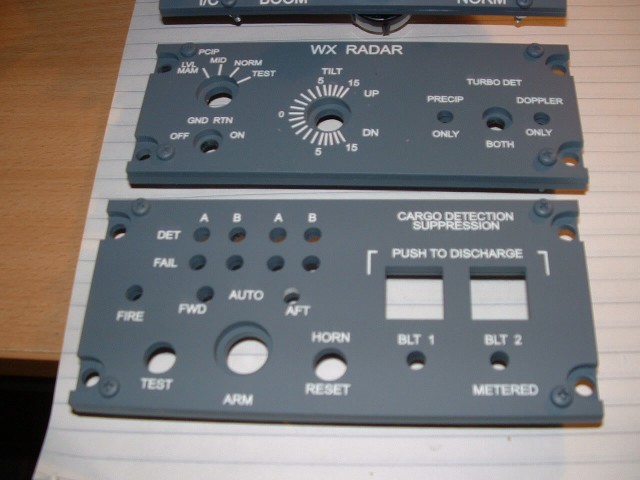
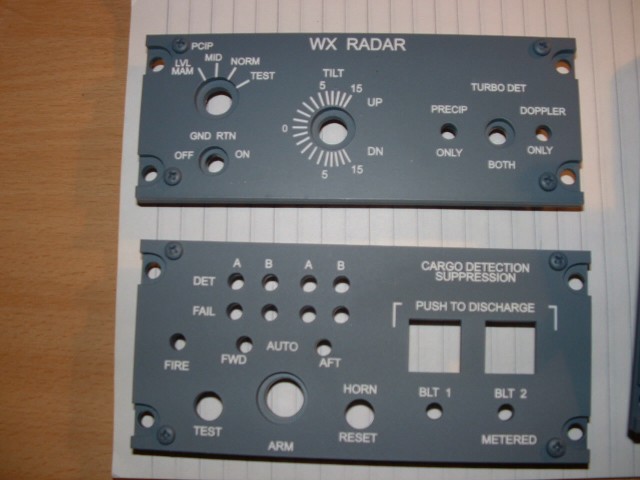
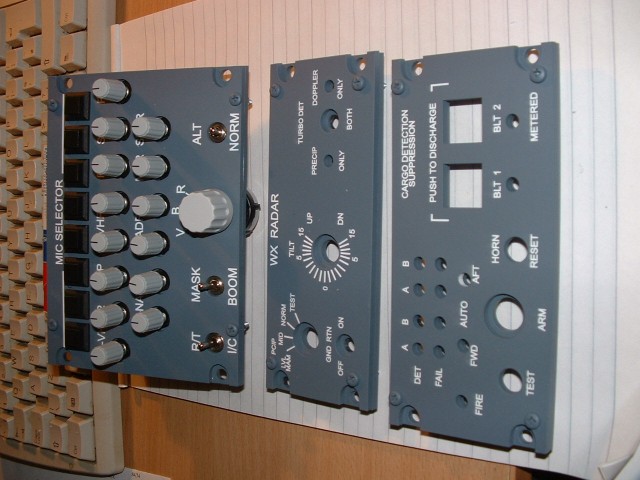
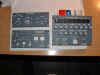
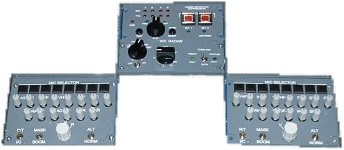 Audio,
Cargo Fire and WX Radar Panels. These have come
from COCKPITSONIC.
First, I have wired them up to a 5v supply so I can operate the
annunciation correctly and also by using switching diodes, i can also
illuminate all the LED's on the Pedestal in a 'Test' or Recall
situation. What I have actually done is this.... The
Captains Panel controls the ON/OFF state of the Power Supply, Switches
my headset microphone to either the Communication PC (for use on the
Vatsim Network with Squawkbox) or to the 5.1 Sound system (for P.A.
calls). It also controls the volume from the sound system,
especially the sub-woofer for that added bit of 'rumble'.
Both the audio panel Pushbutton sets (16 in total) have been connected
to the OPENCOCKPITS
USBKEYS amd BU0836 Card (I have also connected the Rear Overhead Audio Panel
Pushbuttons to this card, adding another 8). This allows me to
control Pushback (in all directions), bring up certain sub panels to
check synchronisation and set certain systems, and generally control
just about anything I choose without leaving the comfort of the
captains seat. I have my preferences, you may choose to controil
something completely different - how good is your imagination
? For a closer look at the quality of these panels, take a
look HERE & HERE.
Apart from the pushbuttons, I am not utilising any of the other
controls on the F/O Audio panel yet, but i have the rest of my life
:o) Audio,
Cargo Fire and WX Radar Panels. These have come
from COCKPITSONIC.
First, I have wired them up to a 5v supply so I can operate the
annunciation correctly and also by using switching diodes, i can also
illuminate all the LED's on the Pedestal in a 'Test' or Recall
situation. What I have actually done is this.... The
Captains Panel controls the ON/OFF state of the Power Supply, Switches
my headset microphone to either the Communication PC (for use on the
Vatsim Network with Squawkbox) or to the 5.1 Sound system (for P.A.
calls). It also controls the volume from the sound system,
especially the sub-woofer for that added bit of 'rumble'.
Both the audio panel Pushbutton sets (16 in total) have been connected
to the OPENCOCKPITS
USBKEYS amd BU0836 Card (I have also connected the Rear Overhead Audio Panel
Pushbuttons to this card, adding another 8). This allows me to
control Pushback (in all directions), bring up certain sub panels to
check synchronisation and set certain systems, and generally control
just about anything I choose without leaving the comfort of the
captains seat. I have my preferences, you may choose to controil
something completely different - how good is your imagination
? For a closer look at the quality of these panels, take a
look HERE & HERE.
Apart from the pushbuttons, I am not utilising any of the other
controls on the F/O Audio panel yet, but i have the rest of my life
:o)


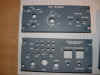
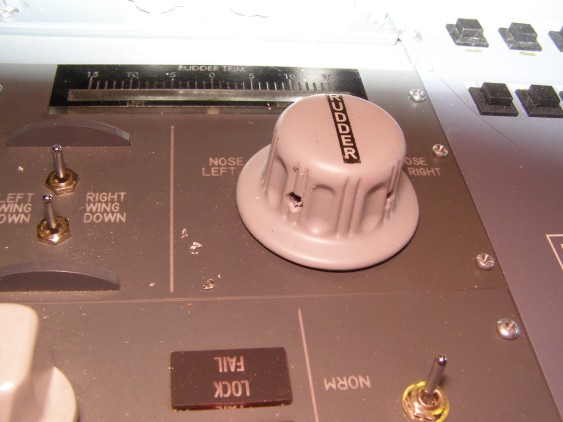
 Rudder
& Aileron Trim & Cockpit Door Panel I
got these from my mate MANOLO at HISPAPANELS.
The Cockpit Door Panel is basically a dummy, i just switch the
Annunciators correctly based on the position of the door control
switch. But the Rudder and Aileron Trim are actually operational
and work like this. I have setup the Throttle Quadrant to
run on Leo BODNAR's amazing BU0836
Joystick Controller. After connecting all the Buttons I
needed for the TQ, I still had plenty left. So the rudder trim
control has been connected to 2 spare button inputs on the
BU0836. Windows and FS see this card as a Joystick, so using
FSUIPC, I have been able to assign the buttons as Rudder Trim Left and
Rudder Trim Right (remember to check the button repeat while held
box). I have done the same with the Left Wing
Down/Right Wing Down switches. These switches are both spring
loaded to 'centre off'. I have wired them so that you have
to push both buttons in the direction that you want the wing lowered
for it to operate. Again connected to the BU0836 card as
Joystick Buttons and assigned in FSUIPC as Aileron Left/Right Trim. Rudder
& Aileron Trim & Cockpit Door Panel I
got these from my mate MANOLO at HISPAPANELS.
The Cockpit Door Panel is basically a dummy, i just switch the
Annunciators correctly based on the position of the door control
switch. But the Rudder and Aileron Trim are actually operational
and work like this. I have setup the Throttle Quadrant to
run on Leo BODNAR's amazing BU0836
Joystick Controller. After connecting all the Buttons I
needed for the TQ, I still had plenty left. So the rudder trim
control has been connected to 2 spare button inputs on the
BU0836. Windows and FS see this card as a Joystick, so using
FSUIPC, I have been able to assign the buttons as Rudder Trim Left and
Rudder Trim Right (remember to check the button repeat while held
box). I have done the same with the Left Wing
Down/Right Wing Down switches. These switches are both spring
loaded to 'centre off'. I have wired them so that you have
to push both buttons in the direction that you want the wing lowered
for it to operate. Again connected to the BU0836 card as
Joystick Buttons and assigned in FSUIPC as Aileron Left/Right Trim.
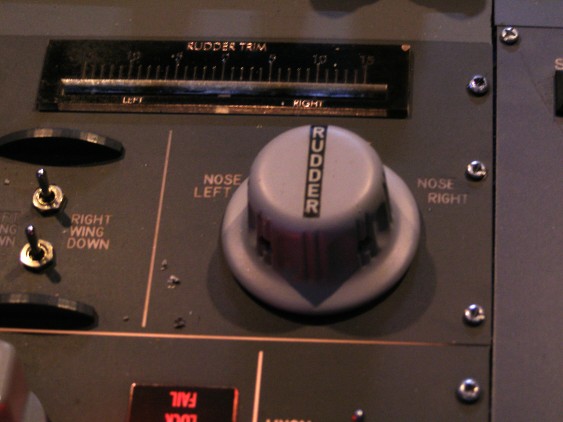
Now I have got a 'real' type RUDDER TRIM KNOB from Nihad at www.simknobs.com
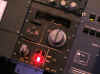
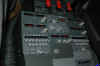
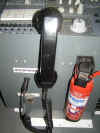
 Fire Panel came from Symulatory in Poland. Annunciators are
working in TEST modes
Fire Panel came from Symulatory in Poland. Annunciators are
working in TEST modes
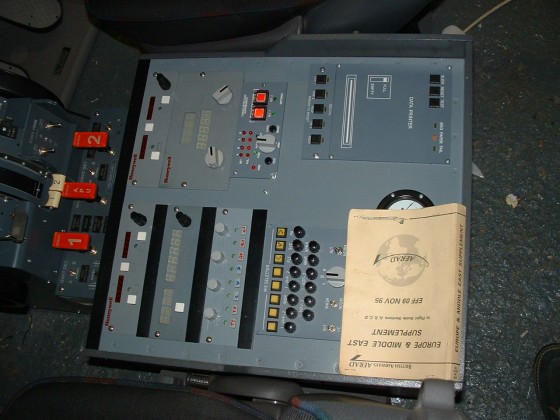
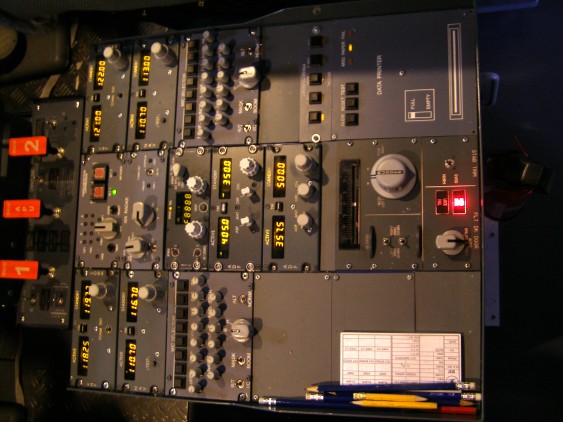
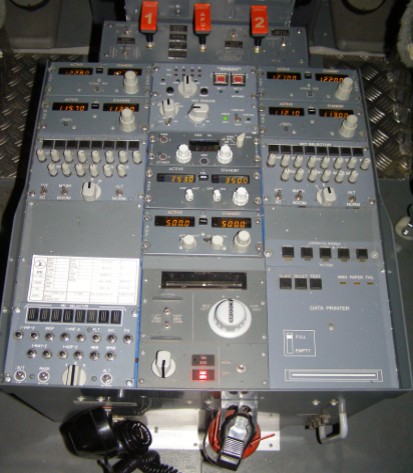
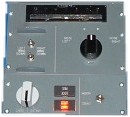
The
Remaining Panels
The Data Printer and the
Selcal Panel are again basically dummies. They are the first panels I
ever bought from COCKPITSONIC. All they really do is fill the
gap cosmetically and illuminate when I do the Test.
Blanking Plates came from MANOLO at HISPAPANELS except for 3 that i
have cut quickly to cover the holes. I have ordered some more cover
panels from Manolo and I can fit these when they arrive.  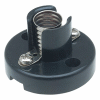 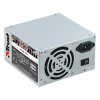 Backlighting
 was relatively easy. Because I had an ATX Power
Supply buried in the depths of the Pedestal, I had a ready available
supply of 12vdc. I calculated that I had sufficient excess
power to drive 10 small MES Bulbs. So strategically
placed around the inside of the cabinet, I have placed 10 simple MES
Bulbholders. As soon as the Power Supply is turned on - VOILA,
not quite like Las Vegas, but excellent for what I want. And
because of where they have been placed, bulb replacement will be easy. And
to stop 'Light Leakage', just use Black Modeller's Clay (you know,
your children have it in their toy box) to seal the gaps. Thanks to
David Bullock for that. Backlighting
Backlighting was relatively easy. Because I had an ATX Power
Supply buried in the depths of the Pedestal, I had a ready available
supply of 12vdc. I calculated that I had sufficient excess
power to drive 10 small MES Bulbs. So strategically
placed around the inside of the cabinet, I have placed 10 simple MES
Bulbholders. As soon as the Power Supply is turned on - VOILA,
not quite like Las Vegas, but excellent for what I want. And
because of where they have been placed, bulb replacement will be easy. And
to stop 'Light Leakage', just use Black Modeller's Clay (you know,
your children have it in their toy box) to seal the gaps. Thanks to
David Bullock for that.
|