|
 David
Bullock
is
a Fellow Builder I have known for 2 Years. I am
exceptionally impressed with the quality level of his
build. David has the kind of 'eye for detail' most of us
dream of. Once i started to see the level of skill put
into this project, i thought it would serve as a benchmark for
the rest of us. Enjoy looking at David's progress
and let's let David tell you what he's been up to..... Ian David
Bullock
is
a Fellow Builder I have known for 2 Years. I am
exceptionally impressed with the quality level of his
build. David has the kind of 'eye for detail' most of us
dream of. Once i started to see the level of skill put
into this project, i thought it would serve as a benchmark for
the rest of us. Enjoy looking at David's progress
and let's let David tell you what he's been up to..... Ian
Background
Back
in 2006, whilst working in Dubai, I spent many lonely evenings
trawling the net, thinking about building a flight simulator. I
chanced across Ian`s site and it all went downhill from then (at
least according to my wife), I even printed out his whole
website and took the papers on holiday with me – brave move.
Anyway,
after much help and support from Ian, coupled with hours
researching, I am now building and a broad outline of my
simulator is:-
Full
size 737 NG cockpit, sitting on a Simmotion Motion Base (when I
have adapted the garage roof trusses to get the necessary height
clearance)
Opencockpits
panels for the pedestal, FMC and EFIS. Opencockpits MCP (via
Ian)
Throttle
from Symulatory
Overhead panels from Simmotion
MIP from FDS
I/O
systems all based on Opencockpits H/W modules and components
using SIOC as the interfacing programme
Genuine yokes, rudder pedals and seats sourced from the USA
Visual will be three projectors using TH2GO
Software
Sim-Avionics 737 package, FSUIPC, FSX, SIOC
and lots of computers
Current
Position
Basically,
as per the following photographs. I am concentrating on getting all
the electronic components completed and interfacing correctly before
building and installing them in the cockpit. Dust, welding and heavy
construction do not mix well with electronics
 Nav
1 Opencockpits panels
rear view showing wiring,
double encoder and use of Opencockpits 7 segment
display pcbs which are invaluable.
Just remember to do the wiring for the decimal point on some earlier
pcbs! (the green wire). I have used pin headers on all cards so that
they can easily be removed and adapted ( Nav
1 Opencockpits panels
rear view showing wiring,
double encoder and use of Opencockpits 7 segment
display pcbs which are invaluable.
Just remember to do the wiring for the decimal point on some earlier
pcbs! (the green wire). I have used pin headers on all cards so that
they can easily be removed and adapted ( corrected). corrected).
Home
made double concentric encoder. I used Bourn shaftless encoders
(Mouser part no 652-ESD0D-S00-GC0006). These will work with
Opencockpits master cards and you just need to find or make the
correct size shafts/tubes/wires to fit inside the encoder housings and
superglue them in place.
 Lausitz
Aviation pedestal unit fitted with Opencockpits MasterCard and
breakout pcbs for inputs/outputs on the base, with 4no display pcbs
around the walls, all connected with IDC ribbon cable. Following
tests, I have decided to do the panel backlighting with dimmable low
energy mains bulbs. It is therefore important that the wiring is kept
low and/or around the walls to avoid masking the light flow to the
panels. It is also preferable to keep wiring runs to a minimum for
both signals and more importantly to reduce voltage drops. The notches
in the support rails for the panels, are to avoid masking the
lettering backlighting. Lausitz
Aviation pedestal unit fitted with Opencockpits MasterCard and
breakout pcbs for inputs/outputs on the base, with 4no display pcbs
around the walls, all connected with IDC ribbon cable. Following
tests, I have decided to do the panel backlighting with dimmable low
energy mains bulbs. It is therefore important that the wiring is kept
low and/or around the walls to avoid masking the light flow to the
panels. It is also preferable to keep wiring runs to a minimum for
both signals and more importantly to reduce voltage drops. The notches
in the support rails for the panels, are to avoid masking the
lettering backlighting.
 Rats nest wiring has
started! There will always be errors, omissions etc, so I wire up
loosely to prove everything works (eventually) and only then trim
back, terminate and properly secure the wires. You will see here and
from later photos that I do not use the common ribbon cable to hook
up. This is a personal choice as I prefer to use molex type pin
headers and connectors to give greatest flexibility, opportunity for
change and to keep the cables out of the way etc to avoid conflicting
with backlighting. I also find that delving through a nest of ribbon
cables tends to dislodge some connections and creates additional
problems. My route is more time consuming in the short term, but
hopefully will prove a good investment. Rats nest wiring has
started! There will always be errors, omissions etc, so I wire up
loosely to prove everything works (eventually) and only then trim
back, terminate and properly secure the wires. You will see here and
from later photos that I do not use the common ribbon cable to hook
up. This is a personal choice as I prefer to use molex type pin
headers and connectors to give greatest flexibility, opportunity for
change and to keep the cables out of the way etc to avoid conflicting
with backlighting. I also find that delving through a nest of ribbon
cables tends to dislodge some connections and creates additional
problems. My route is more time consuming in the short term, but
hopefully will prove a good investment.
 The dummy Audio panel
complete except for one knob. The pencil knobs were made from 10mm
acrylic rod, with machining on my lathe and milling machine – very
tiresome and I nearly gave up! Sadly the end result was spoilt when I
glued the knobs to their base, as three knobs have developed a
different colour cast. Acrylic is very sensitive to this, for example
the lower black band to the knobs initially turned the whole pencil
knob black – I had to apply a white layer under the black to avoid
this. The panel is a dummy one, though some knobs will light up and I
will use the switches for other functions ( like generating a fire in
engine no 2 at V2 when the co-pilot is taking off). The dummy Audio panel
complete except for one knob. The pencil knobs were made from 10mm
acrylic rod, with machining on my lathe and milling machine – very
tiresome and I nearly gave up! Sadly the end result was spoilt when I
glued the knobs to their base, as three knobs have developed a
different colour cast. Acrylic is very sensitive to this, for example
the lower black band to the knobs initially turned the whole pencil
knob black – I had to apply a white layer under the black to avoid
this. The panel is a dummy one, though some knobs will light up and I
will use the switches for other functions ( like generating a fire in
engine no 2 at V2 when the co-pilot is taking off).
  The
business end of the EFIS –there is a lot happening in a small space!
Then on the right, the
pretty bit of the EFIS, again using Opencockpits panels, though the
knobs and centre legends were home made. The
business end of the EFIS –there is a lot happening in a small space!
Then on the right, the
pretty bit of the EFIS, again using Opencockpits panels, though the
knobs and centre legends were home made.
I wanted to achieve as
much realism as possible, yet not spend a fortune and could not
therefore find a suitable ready built EFIS that could provide the
three functions on the BARO  and MINS shafts – ie
a rotary switch, encoder and push button for the RST and STD
functions. So I built one as per the photo left, by drilling through
the shaft of a rotary switch and inserting a aluminium tube which
drives and MINS shafts – ie
a rotary switch, encoder and push button for the RST and STD
functions. So I built one as per the photo left, by drilling through
the shaft of a rotary switch and inserting a aluminium tube which
drives  the encoder above.
Into the aluminium tube I inserted a length of piano wire which
actuates a micro switch above the encoder (the one with the green and
yellow wires). So far it works! the encoder above.
Into the aluminium tube I inserted a length of piano wire which
actuates a micro switch above the encoder (the one with the green and
yellow wires). So far it works!
The complete MCP and EFIS, I have changed the standard Opencockpit MCP
knobs to more closely resemble the 737.
 The
working end of the MCP EFIS. Again, I have used an Opencockpits Master
card with breakout pcbs, though there was not quite enough input
connections!. The whole unit, when fitted to the MIP will be pivoted
from the rear so it can be released and swung down for
maintenance/corrections. All connections have been annotated, as I
will never remember what goes where (you may think you can – but
trust me, you will forget!!) The
working end of the MCP EFIS. Again, I have used an Opencockpits Master
card with breakout pcbs, though there was not quite enough input
connections!. The whole unit, when fitted to the MIP will be pivoted
from the rear so it can be released and swung down for
maintenance/corrections. All connections have been annotated, as I
will never remember what goes where (you may think you can – but
trust me, you will forget!!)
 The
FDS MIP – superbly made and it all fitted together like a dream –
not the cheapest but you get real quality The
FDS MIP – superbly made and it all fitted together like a dream –
not the cheapest but you get real quality
 and
accuracy The more observant (Ian) will notice that the Yaw gauge is
the wrong way round. When I can get the MIP out of my shed, it will be
corrected! You can also see the empty MCP housing and its`s base can
be adapted to swivel downwards. and
accuracy The more observant (Ian) will notice that the Yaw gauge is
the wrong way round. When I can get the MIP out of my shed, it will be
corrected! You can also see the empty MCP housing and its`s base can
be adapted to swivel downwards.
Fitted, Home made gear lever,
based on as many photos as I could gather.
 A
view of the rear of the Gear mechanism, based on pictures from
suppliers A
view of the rear of the Gear mechanism, based on pictures from
suppliers
 Rear
of Flaps and N1 panel. Again, I have kept to the principle of being
able to remove any panel easily by simply unplugging connections. The
concentric switch and encoder mechanism can also be seen. Rear
of Flaps and N1 panel. Again, I have kept to the principle of being
able to remove any panel easily by simply unplugging connections. The
concentric switch and encoder mechanism can also be seen.
 MIP
wiring commenced – make sure that you have plenty of length in the
wire tails as you can never be sure of the future routing at this
stage. MIP
wiring commenced – make sure that you have plenty of length in the
wire tails as you can never be sure of the future routing at this
stage.
 MIP
wiring nearing completion. The Opencockpits USB card,
Mastercard, servo and breakout pcbs have been mounted on a
panel that is hinged and can easily be released from the top to access
the MIP Panel wiring This Opencockpits USB Expansion card will also
drive the MCP Mastercard and additional functions for the Throttles. MIP
wiring nearing completion. The Opencockpits USB card,
Mastercard, servo and breakout pcbs have been mounted on a
panel that is hinged and can easily be released from the top to access
the MIP Panel wiring This Opencockpits USB Expansion card will also
drive the MCP Mastercard and additional functions for the Throttles.
 Overall
view of the rear (left), showing wiring and support frames for the LCD
monitors. I Overall
view of the rear (left), showing wiring and support frames for the LCD
monitors. I
 used
Acer 19” widescreen monitors which fitted well and were easy to
dismantle. The adaptable monitor support frames are based on an idea
from FDS – I just decided it was cheaper to make them rather than
buy them. used
Acer 19” widescreen monitors which fitted well and were easy to
dismantle. The adaptable monitor support frames are based on an idea
from FDS – I just decided it was cheaper to make them rather than
buy them.
Finally, All lit up! – I sat for hours just looking at it with a
beer (or two) in my hand (Good Man David, i like your thinking - Ian
). The FDS integrated lighting is consistent and looks great. The
software driving the displays is Sim-Avionics – will be good value
when full 737 functionality is shortly added.
 Preparation
and assembly of the Opencockpits FMC. Running alongside
the Sim-Avionics suite. Preparation
and assembly of the Opencockpits FMC. Running alongside
the Sim-Avionics suite.
Have a look at the .pdf file HERE
or click on the image in the left column.
David
J.Bullock CHELMSFORD United Kingdom
|
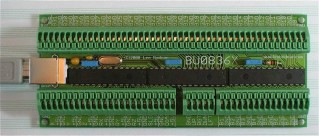 BU0836X