|
17/05/15
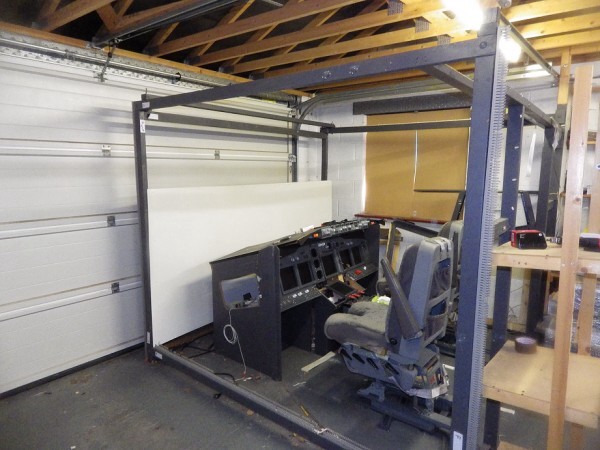
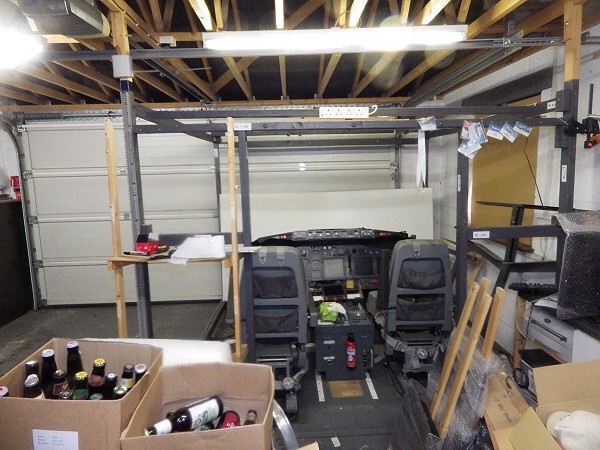
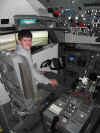
Well 'NOTHING IS FOREVER' and the end of an era, so to
speak. Sold the sim to a colleague in Newcastle on Tyne and no
looking back. Been a long and enjoyable journey, learnt a lot,
cried a lot, got frustrated a lot, but got there and it just did not
challenge me anymore. That's when the enjoyment ends.
Becomes a chore, a job even. My thanks to everybody who
mailed to see where I was at and of course to all the friends and
colleagues I have made over the past 9 years.


 But
it doesn't end there, oh no sir. I have gone over to the 'DARK
SIDE'. Got a clear workbench, some PC's lying around and
toying with the idea of an A320. Yes that's right an A320, sorry
chaps. Just playing around with JEEHEEL at the moment to
see what we can do with it. Like starting at the bottom again,
so it's interesting and keeping me occupied. Completely
different set of rules, physics, and control structure. So it's
back to school to get a handle on how this aircraft
works. Want to get it all working on the workbench
first before I start ploughing out the cash I got for the sim on
hardware. But
it doesn't end there, oh no sir. I have gone over to the 'DARK
SIDE'. Got a clear workbench, some PC's lying around and
toying with the idea of an A320. Yes that's right an A320, sorry
chaps. Just playing around with JEEHEEL at the moment to
see what we can do with it. Like starting at the bottom again,
so it's interesting and keeping me occupied. Completely
different set of rules, physics, and control structure. So it's
back to school to get a handle on how this aircraft
works. Want to get it all working on the workbench
first before I start ploughing out the cash I got for the sim on
hardware.
 25/11/2014
Where have I been since beginning of June. Well I've been 'press
ganged' out of retirement by my old company on a fixed term contract
to help them thru a very busy time. I'm averaging 50 hours a
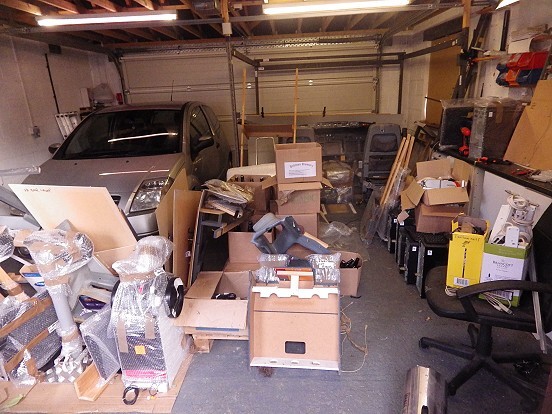
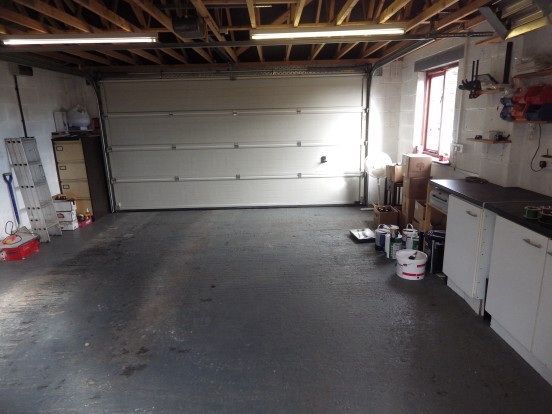
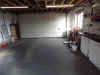
week, so no time for anything else. So, tidying up the
workshop, I've got to make some space. I have accumulated
so much stuff over the years that it's time to find it a new
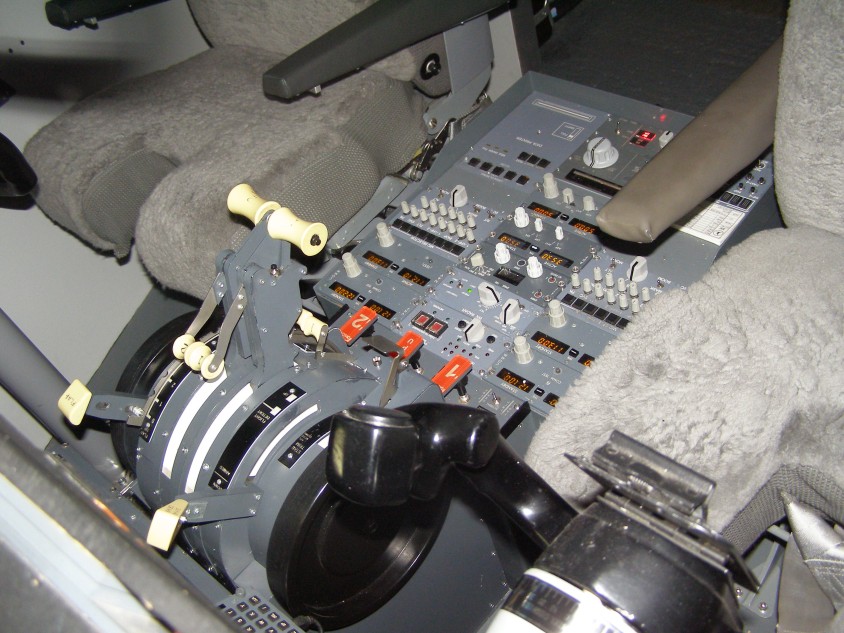
home. I also have a complete cockpit that I've been tasked
with selling. Might do a bit of Jiggery-Pokery and swap out some
of my kit. 25/11/2014
Where have I been since beginning of June. Well I've been 'press
ganged' out of retirement by my old company on a fixed term contract
to help them thru a very busy time. I'm averaging 50 hours a
week, so no time for anything else. So, tidying up the
workshop, I've got to make some space. I have accumulated
so much stuff over the years that it's time to find it a new
home. I also have a complete cockpit that I've been tasked
with selling. Might do a bit of Jiggery-Pokery and swap out some
of my kit.
There's Input/Output cards, MIP Panels, Servo Gauges and coming up
will be a 'shitload' of CPFlight Kit in 'as new condition', some Weber
Seats, JRails, Yokes, an Overhead, an MIP, some FDS (new) CDU's.
I just need to find the time to photograph & catalog it.
Click the For Sale sign for whats ready now.


 12/05/2014
I've just spent a week playing with FSX and P3D. Got FSX running
very stable and clean and it's giving me amazing frame rates on an i3
machine with an 'economy' GT630 card. No bad habits or
crashes, just working. Sadly the Posky 737 just didn't 'cut the
mustard' I'm afraid. Nice visual model, but flew like a 'bitch
on heat', just had no finesse at all. So i've decided not to use
it. 12/05/2014
I've just spent a week playing with FSX and P3D. Got FSX running
very stable and clean and it's giving me amazing frame rates on an i3
machine with an 'economy' GT630 card. No bad habits or
crashes, just working. Sadly the Posky 737 just didn't 'cut the
mustard' I'm afraid. Nice visual model, but flew like a 'bitch
on heat', just had no finesse at all. So i've decided not to use
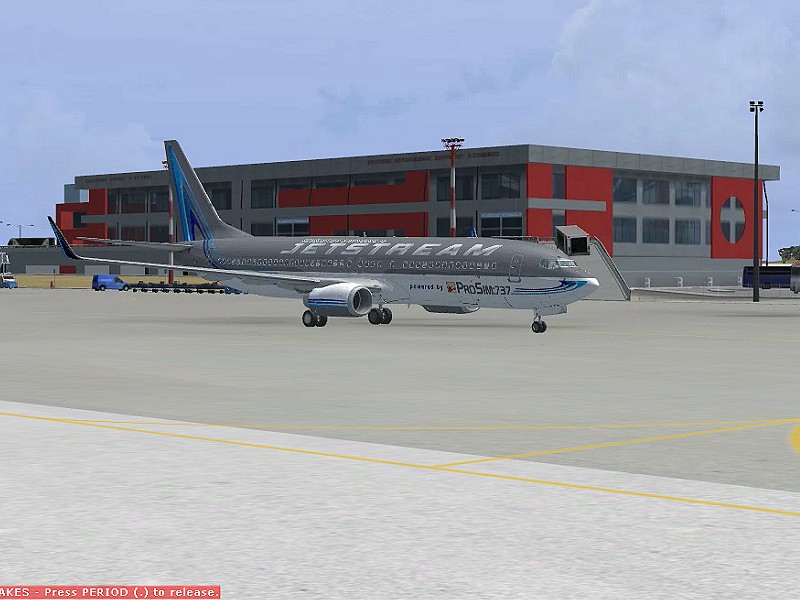
it.   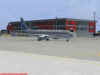 So
on we went trying out the Jetstream models - HAPPY DAYS.
I've loaded the 737-700 and the 737-800. But I have a major
issue with the 700 series. Just doesn't respond to VNAV.
Supposed to have been a VNAV fix in v1.3 - YEAH RIGHT :o) So,
it's 800 then.... So
on we went trying out the Jetstream models - HAPPY DAYS.
I've loaded the 737-700 and the 737-800. But I have a major
issue with the 700 series. Just doesn't respond to VNAV.
Supposed to have been a VNAV fix in v1.3 - YEAH RIGHT :o) So,
it's 800 then....
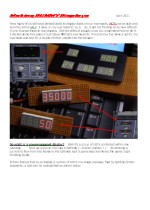
The next problem I had was the weather depiction. FSX (and P3D)
standard weather is notoriously bad bad bad. So I've been
experimenting with REX textures. Only problem (after
downloading a 10gb program) is it sucks ! Just doesn't do what I
want it to do. Much too 'hands on', no automatic weather
injection (you have to set it up each time you want to load weather)
and you have to wait a lifetime for it to load textures each time -
BUMMER ! Ok pretty, but much too time consuming when you have 3 PC's
to get running. Cant use Active  Sky because I would have to buy
a licence for each machine and that's a f*****g lot of dosh
man. So, after experimenting with different
solutions, what I settled for was to use Open
Clouds. It's a
simple utility from FSOpen that injects Real World Weather into FSX
with some amazing results. Not stunning, but very, very
acceptable. It's free to use at any UK airport (starting EG) and for
whole world coverage, it's Just GB£5 yearly (about 6 euros) a year -
BARGAIN, fits in with my free and cheap mentality :o) Sky because I would have to buy
a licence for each machine and that's a f*****g lot of dosh
man. So, after experimenting with different
solutions, what I settled for was to use Open
Clouds. It's a
simple utility from FSOpen that injects Real World Weather into FSX
with some amazing results. Not stunning, but very, very
acceptable. It's free to use at any UK airport (starting EG) and for
whole world coverage, it's Just GB£5 yearly (about 6 euros) a year -
BARGAIN, fits in with my free and cheap mentality :o)
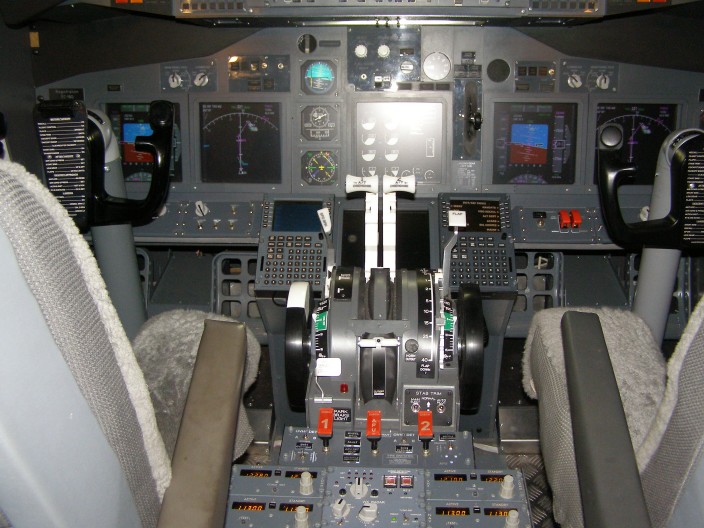
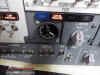
 09/05/2014
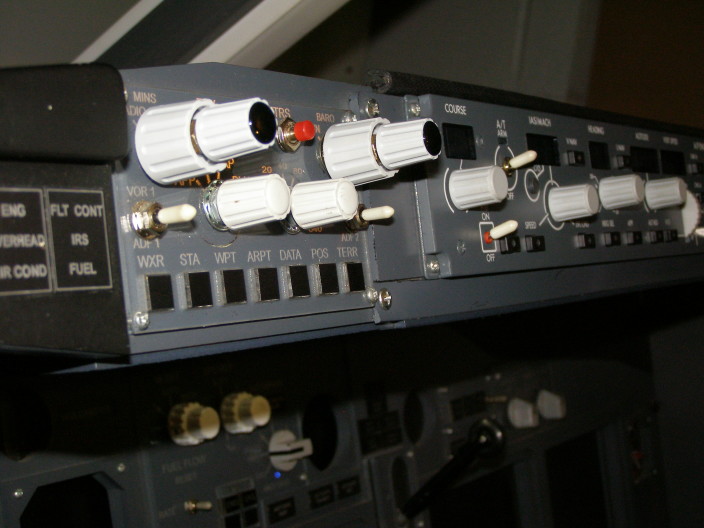
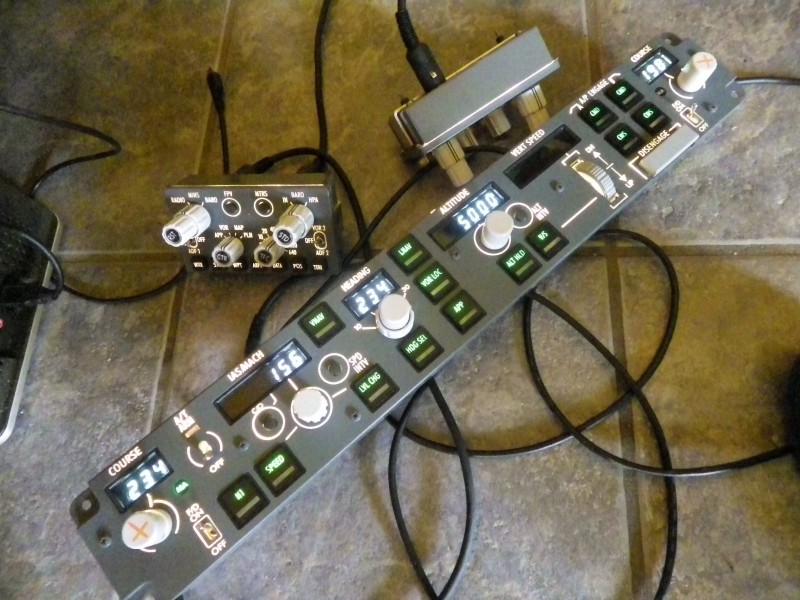
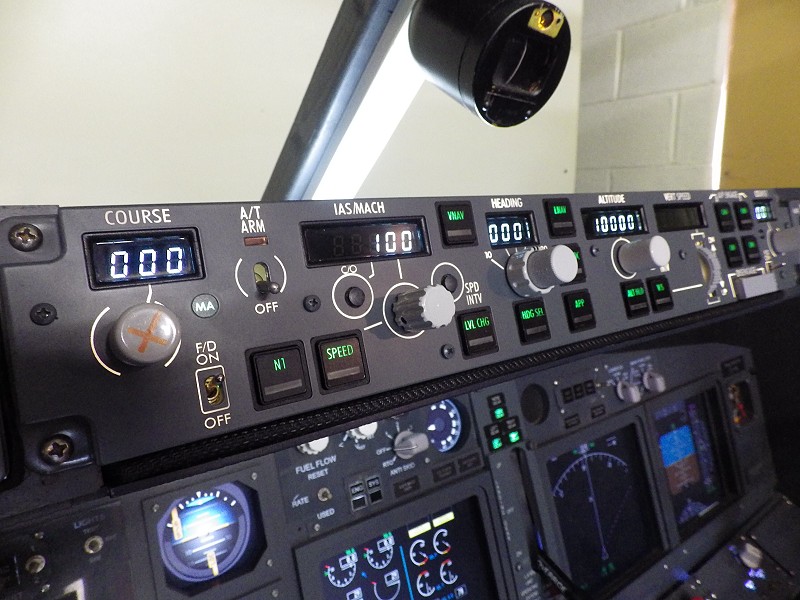
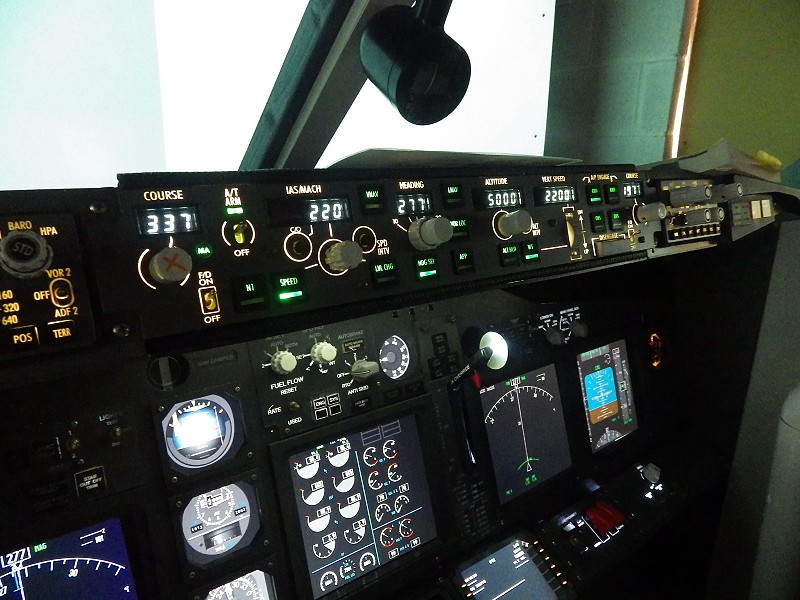
OK, i'm just a bitch :o) I've gone PRO. Got myself a
CPFLIGHT MCP Pro and 2 x EFIS. What a difference over the
EL version :o) Sold my existing MCP & EFIS to Aden
Murcutt before I actually got these, so it was a straight swap because
the cases are actually the same size. Took one set out today and
'straight swapped' the new one's.... HAPPY DAYS. Didn't have to
do anything, new MCP just installed on the existing Comm port. 09/05/2014
OK, i'm just a bitch :o) I've gone PRO. Got myself a
CPFLIGHT MCP Pro and 2 x EFIS. What a difference over the
EL version :o) Sold my existing MCP & EFIS to Aden
Murcutt before I actually got these, so it was a straight swap because
the cases are actually the same size. Took one set out today and
'straight swapped' the new one's.... HAPPY DAYS. Didn't have to
do anything, new MCP just installed on the existing Comm port.


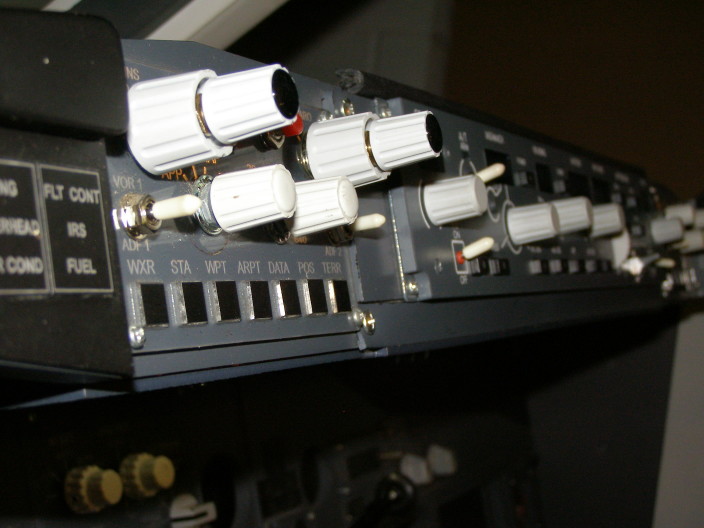
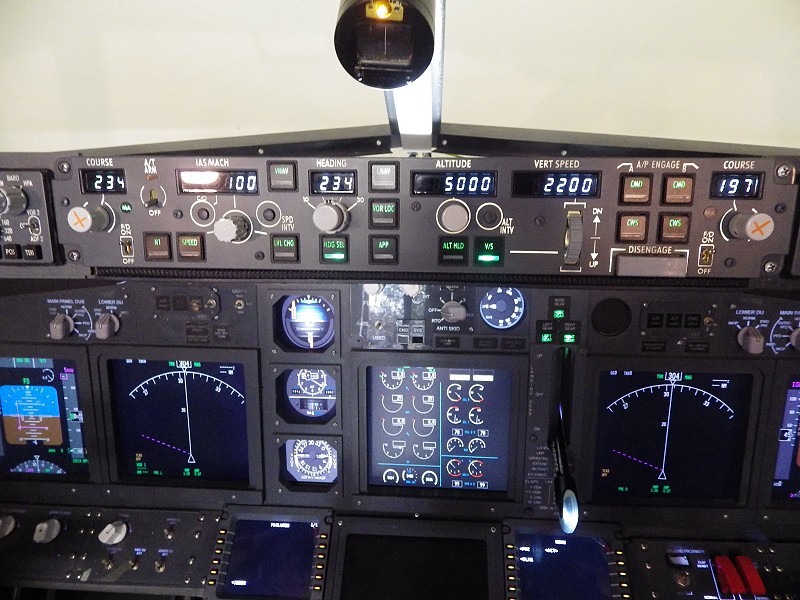
Backlighting
is much more realistic, now I have a bank angle adjuster and dont you
just love the solenoid actuated autothrottle disengage (makes a lovely
'clunk' sound). Took it out for a short test flight around
TIVAT, but today, i'm going to beat the living crap out of it from
Manchester to Tenerife South to get the feel for it. Yes,
I broke my compass fitting it :o(
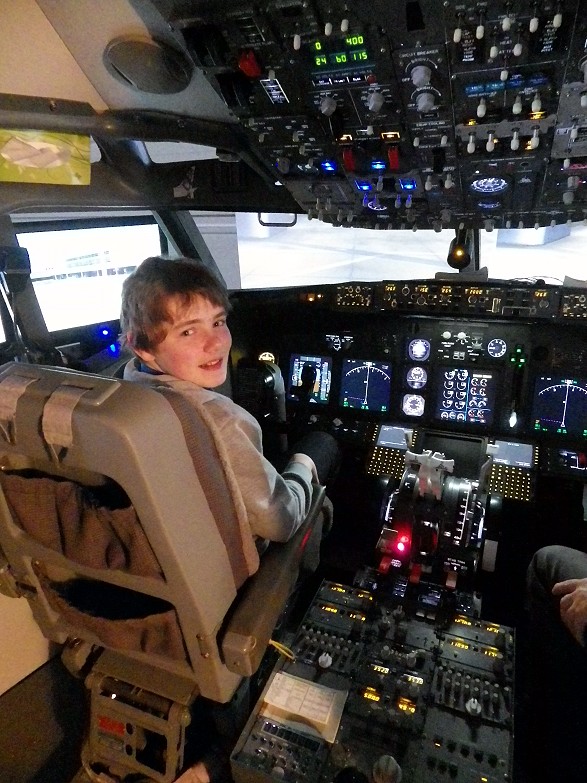
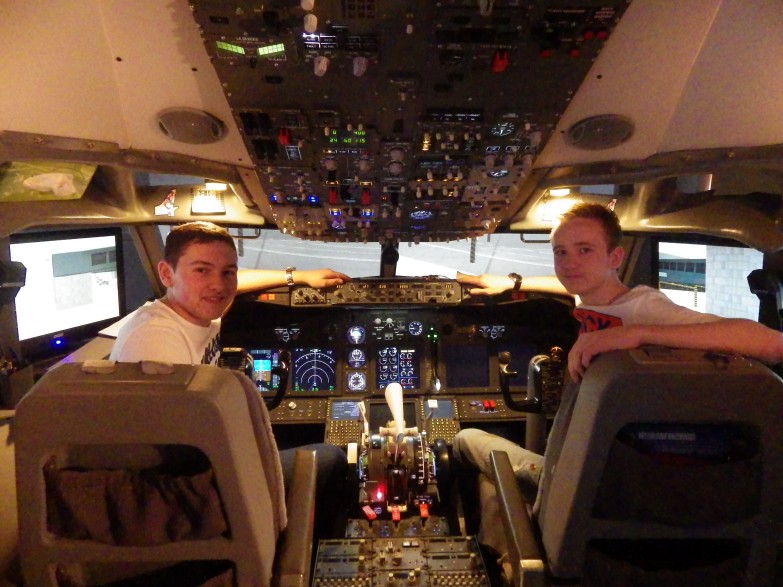
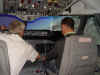
  Two
visitors in this week, Owen Kelly from Wrexham and Mike Bellis (He was
a Star) from Chester. Owen is the youngest visitor I've ever had
at 13. I dont usually have visitors this young as it
all tends to get ahead of them and they loose a vision of what's
happening. But this young man was really up
there. He probably spends untold hours in his
bedroom toying with the iFly or NGX. A pleasure to
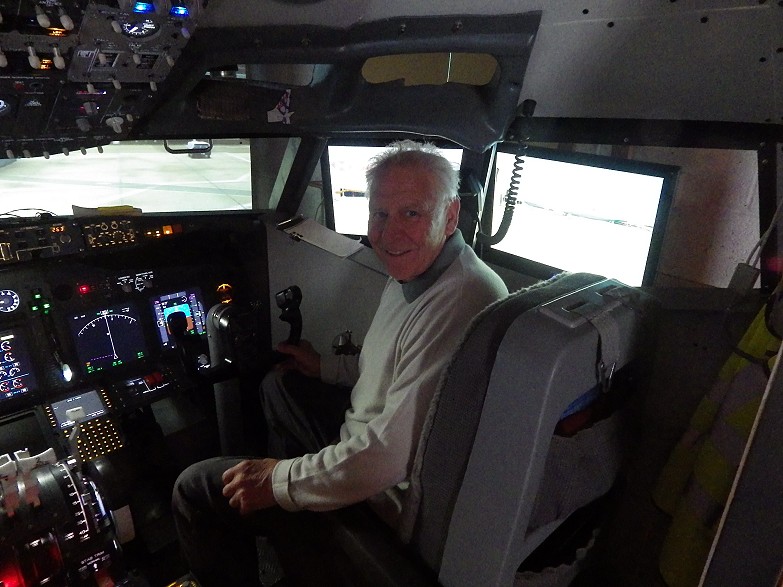
fly with him. And then uncle Mike..... knows
absolutely nothing about aviation, but took it all in like a sponge
and is ready for his ATPL test :o) Two
visitors in this week, Owen Kelly from Wrexham and Mike Bellis (He was
a Star) from Chester. Owen is the youngest visitor I've ever had
at 13. I dont usually have visitors this young as it
all tends to get ahead of them and they loose a vision of what's
happening. But this young man was really up
there. He probably spends untold hours in his
bedroom toying with the iFly or NGX. A pleasure to
fly with him. And then uncle Mike..... knows
absolutely nothing about aviation, but took it all in like a sponge
and is ready for his ATPL test :o)
Bit going on in the background. Considering going over to
P3D. Got a new 'state of the art' PC built and am in
the process of migrating all my FSX Scenery over (what a f*****g
laborious job). The Jetstream is working
in P3D, I also have a POSKY B738 working and over the weekend, I hope
to get REX4 doing the business. WTS !
 01/05/2014
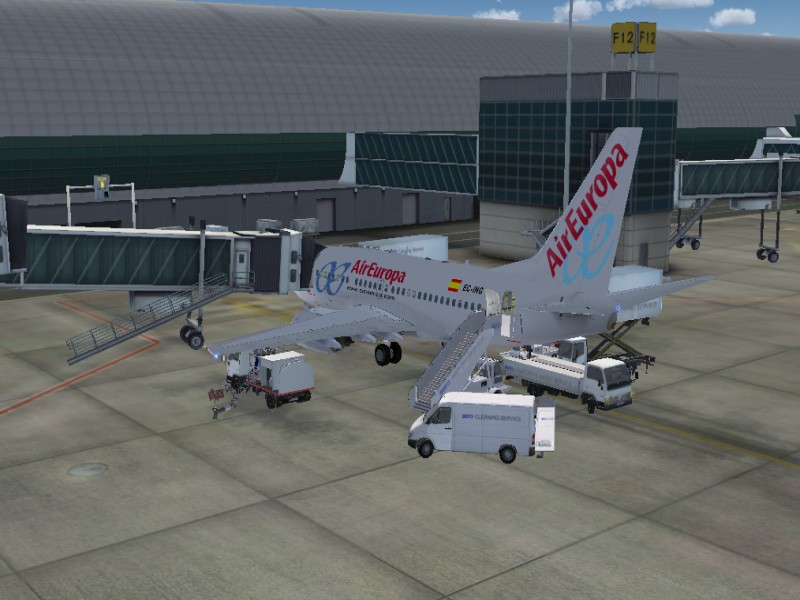
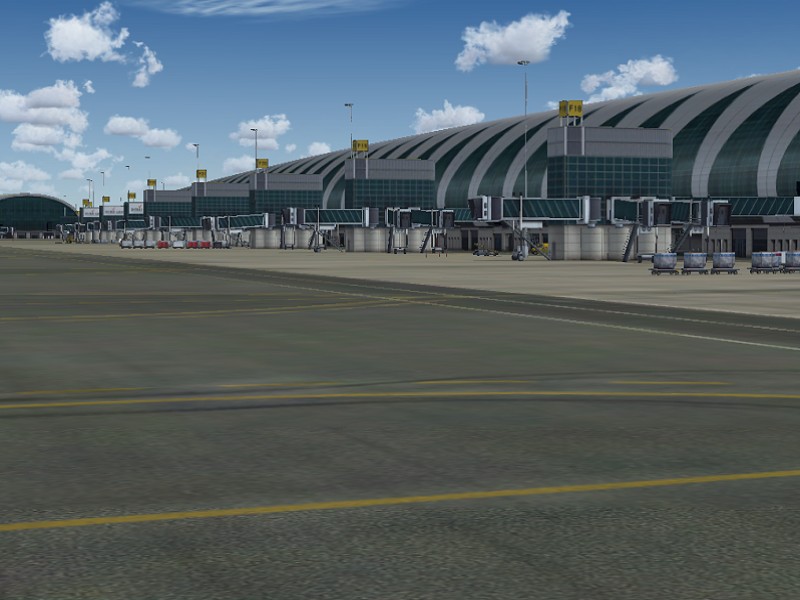
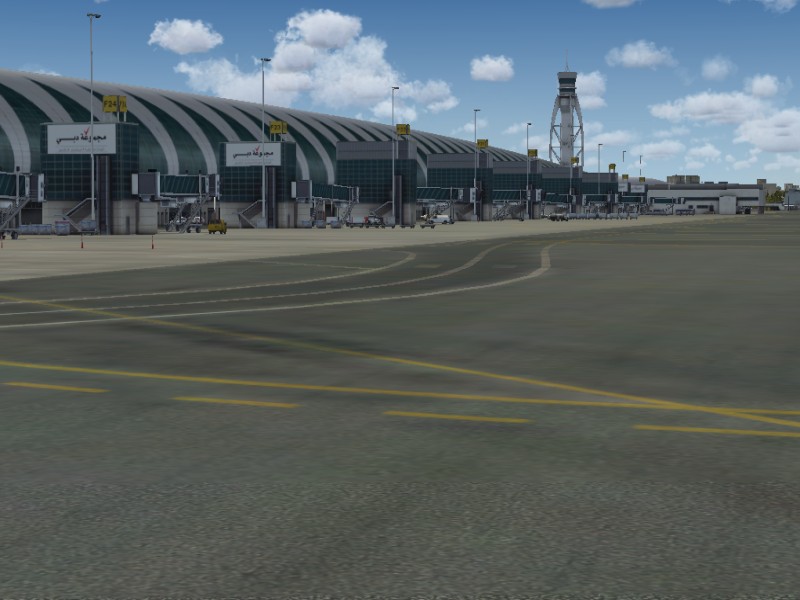
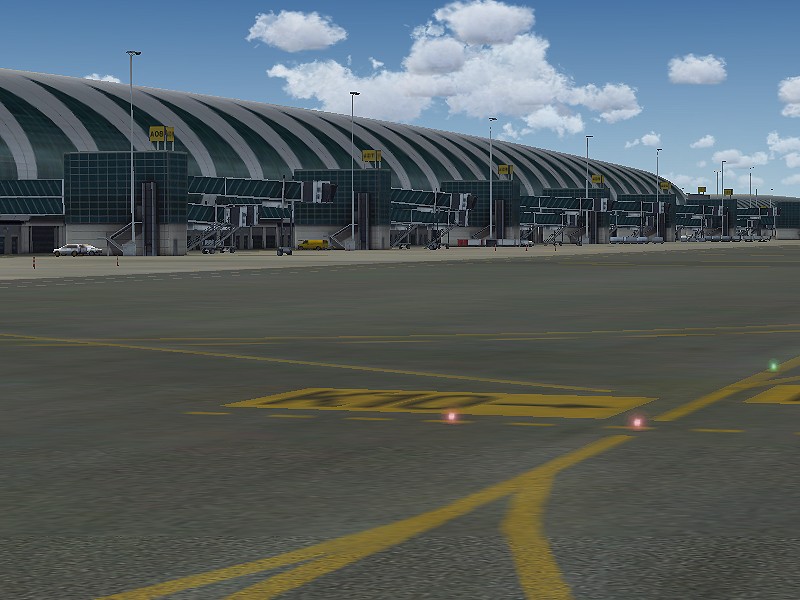
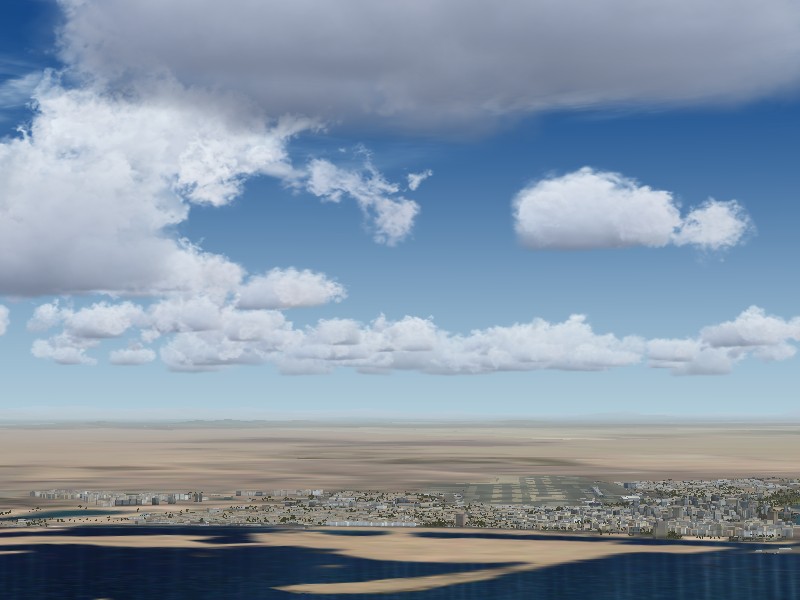
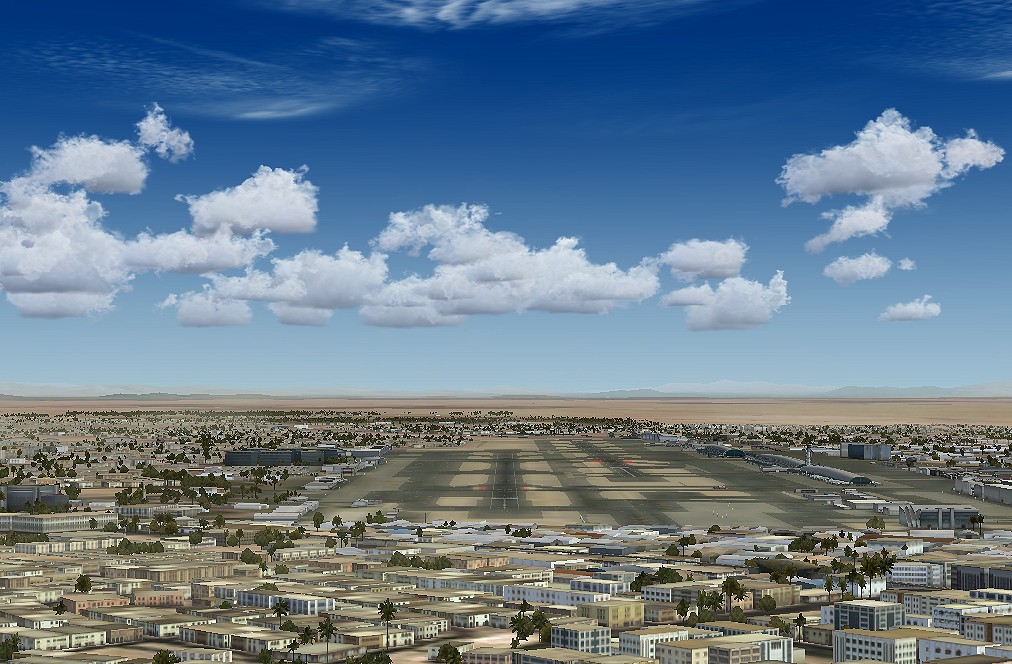
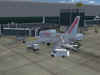
Did a flight into DUBAI
yesterday and took some screenshots. This has got to be the best
scenery package I've bought for a long, long time. Very
detailed city and surrounding area. Real eye candy on the
approach. Tons of buildings and just about every
tree. Airport also very
detailed and it's AES compatible so we have the service
fleet. My only criticism is there is no static traffic
parked at the gates nor animated traffic on the airport
itself. But on a scale of 1 to 10, it's gotta score a 9
:o) 01/05/2014
Did a flight into DUBAI
yesterday and took some screenshots. This has got to be the best
scenery package I've bought for a long, long time. Very
detailed city and surrounding area. Real eye candy on the
approach. Tons of buildings and just about every
tree. Airport also very
detailed and it's AES compatible so we have the service
fleet. My only criticism is there is no static traffic
parked at the gates nor animated traffic on the airport
itself. But on a scale of 1 to 10, it's gotta score a 9
:o)


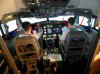
    30/04/2014
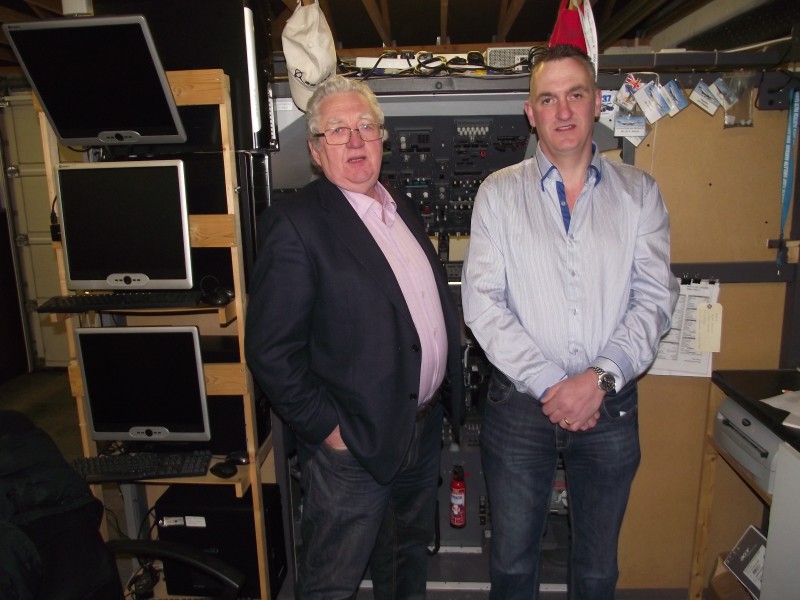
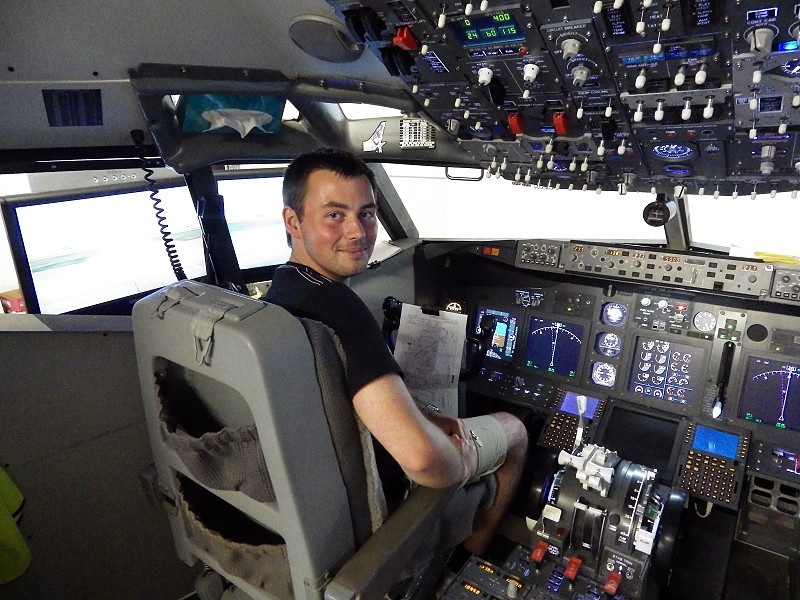
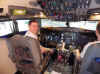
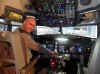
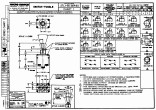
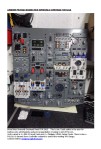
Chris Rigby mailed me this morning and he's got a complete 747
simulator for sale. It's an original Boeing Simulator
which is ex-Aer Lingus 200 Series Simulator that has been converted
to fully functioning 400 series avionics Glass Cockpit. 150
degree wrap around visuals off 3 Benq projectors running Prepar3D and
Project Magenta. Original Boeing genuine
Parts. Complete in its own 'box' and has a 3
person cabin which would make it great for an entertainment
package. Click on the 'datasheet' image for more details or
contact Chris Rigby HERE. 30/04/2014
Chris Rigby mailed me this morning and he's got a complete 747
simulator for sale. It's an original Boeing Simulator
which is ex-Aer Lingus 200 Series Simulator that has been converted
to fully functioning 400 series avionics Glass Cockpit. 150
degree wrap around visuals off 3 Benq projectors running Prepar3D and
Project Magenta. Original Boeing genuine
Parts. Complete in its own 'box' and has a 3
person cabin which would make it great for an entertainment
package. Click on the 'datasheet' image for more details or
contact Chris Rigby HERE.
 27/04/2014
Busy week last week so not a lot of time to get 'stuff' done.
Two days out of my week and having to fit that all around my visits to
the Hospital to see my father-in law, dont leave a lot of space.
But the end is in sight. Had Ollie Hall and Josh
Coles here for a bit of 'multi-crew' practise. They were most
insistent on wearing the belts (?) Engine failures, Electrical
Failures, Go-Arounds, they really took it to the limit - trust me. 27/04/2014
Busy week last week so not a lot of time to get 'stuff' done.
Two days out of my week and having to fit that all around my visits to
the Hospital to see my father-in law, dont leave a lot of space.
But the end is in sight. Had Ollie Hall and Josh
Coles here for a bit of 'multi-crew' practise. They were most
insistent on wearing the belts (?) Engine failures, Electrical
Failures, Go-Arounds, they really took it to the limit - trust me.
Then Wednesday my pleasure to welcome Edd Davies in from Shrewsbury
for a 'hands on' flight from Gatwick to Edinburgh. Edd's a Paramedic
who gets seconded to Dubai for Search & Rescue Duty and he got me
thinking about expanding my horizons. So I bought
the FlyTampa
OMDB Dubai Scenery :o) Very high detail and
quality. Just done a couple of flights in there and I have to
say it's one of the best scenery packages I've seen and frame rate
friendly. Screenshots to follow.


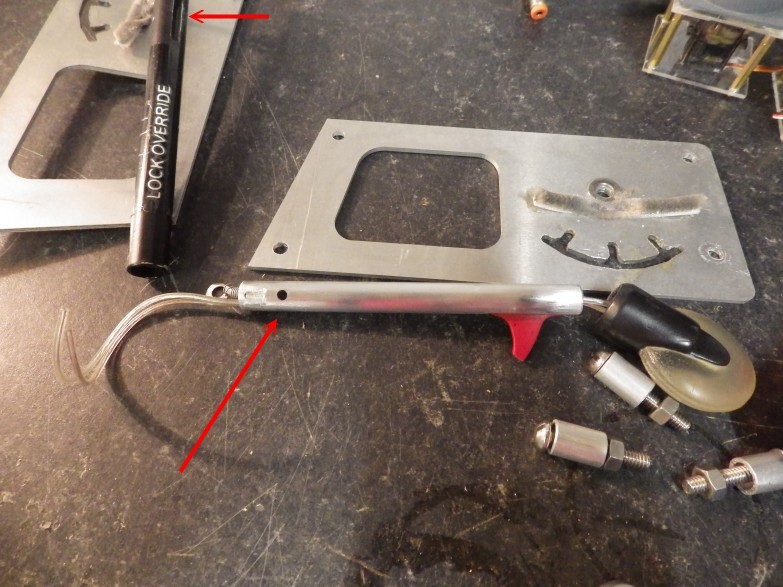
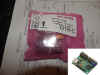
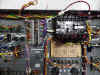
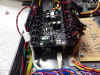
   22/04/2014
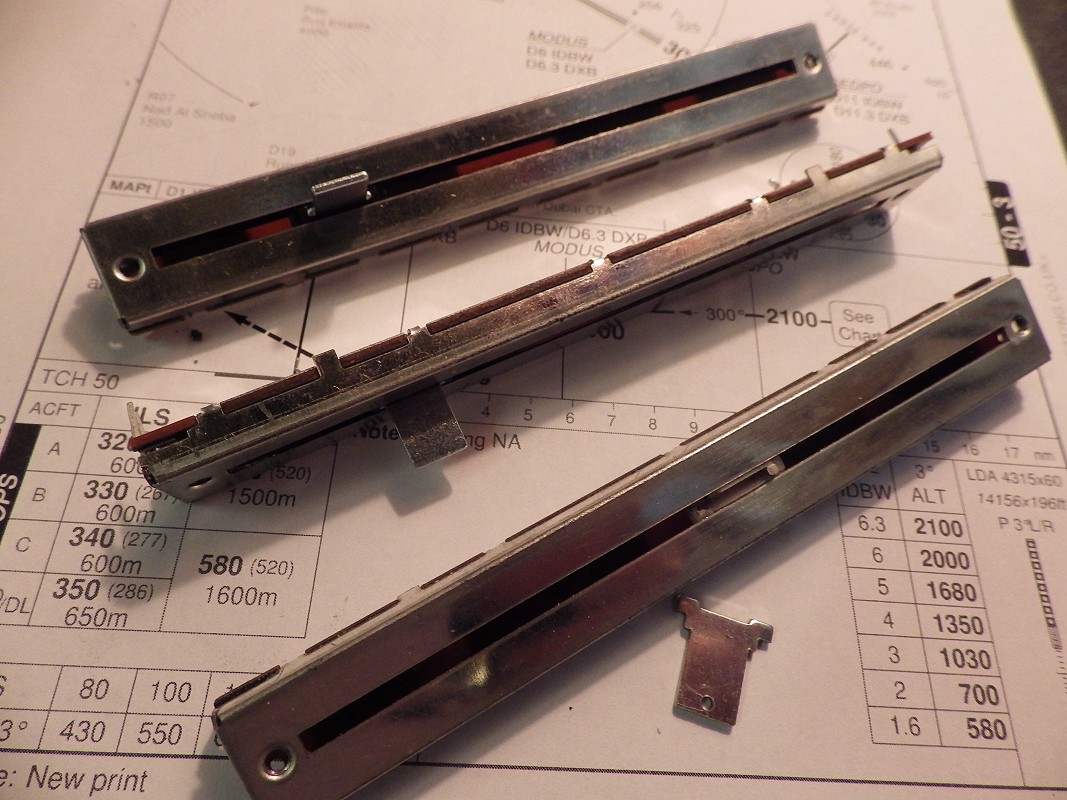
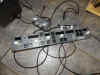
BOURNS Slide Potentiometer PTB0143-2010BP-B103 (that's a mouthfull
isn't it). FARNELL in the UK have them HERE
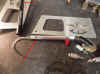
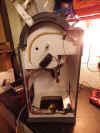
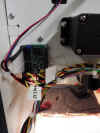
at £4.88 (about 5.86euro) Well I have had to replace both the slide potentiometers in
my Revolution Simproducts TQ for the third time, as there seems to be
a problem with the range of the lever driver arms being greater than
the travel of the potentiometer. So what happens is the levers
drive the pot levers constantly up against the end stops and
eventually the metal tabs break off rendering the pot useless.
So, I have added some 'stops' to prevent this from
happening. And on top of that couple of visitors Saturday who managed to break my
Gear Lever :o( So a week of doing repairs !! 22/04/2014
BOURNS Slide Potentiometer PTB0143-2010BP-B103 (that's a mouthfull
isn't it). FARNELL in the UK have them HERE
at £4.88 (about 5.86euro) Well I have had to replace both the slide potentiometers in
my Revolution Simproducts TQ for the third time, as there seems to be
a problem with the range of the lever driver arms being greater than
the travel of the potentiometer. So what happens is the levers
drive the pot levers constantly up against the end stops and
eventually the metal tabs break off rendering the pot useless.
So, I have added some 'stops' to prevent this from
happening. And on top of that couple of visitors Saturday who managed to break my
Gear Lever :o( So a week of doing repairs !!
   14/04/2014
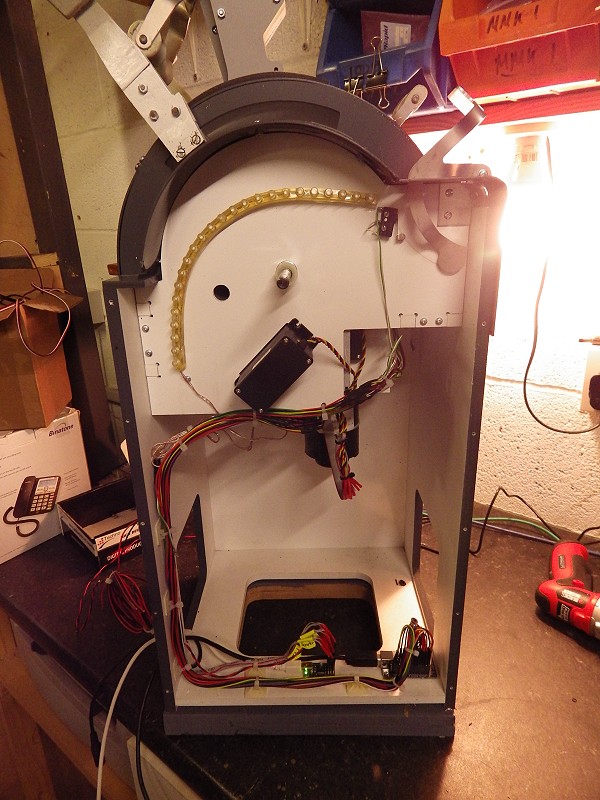
You can tell the warm weather is coming, been spending some time in
the workshop. Recently I have been reading a couple
of posts in forums about the yoke design using gas
struts. I originally used Gas Struts to give me a
'fluid' movement as opposed to springs, but there was no FEEL to
it.. But I was messing about with the Footlift on an
Industrial Sewing Machine and I had a 'light bulb moment'.
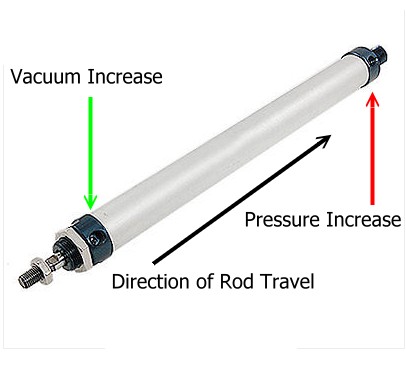
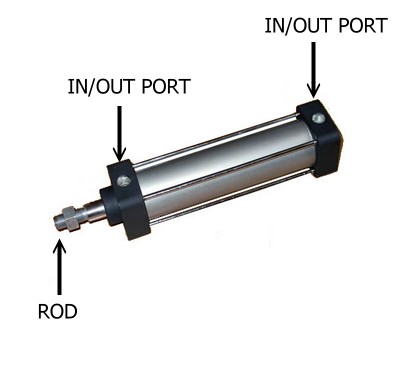
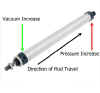
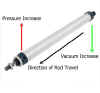
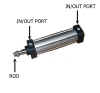
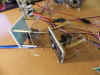
Why not use Air Cylinders? You see a Double Action
Air Cylinder has an internal piston/seal and can be fed with pressure
from both ends which will cause the rod to move as the pressure rises
behind the piston. So, you may be conversant with the term
'For every action there is an equal and opposite
reaction'. What if we centre the rod and use two plugs to
seal the IN/OUT Ports on either end of the cylinder... Hmmm.
14/04/2014
You can tell the warm weather is coming, been spending some time in
the workshop. Recently I have been reading a couple
of posts in forums about the yoke design using gas
struts. I originally used Gas Struts to give me a
'fluid' movement as opposed to springs, but there was no FEEL to
it.. But I was messing about with the Footlift on an
Industrial Sewing Machine and I had a 'light bulb moment'.
Why not use Air Cylinders? You see a Double Action
Air Cylinder has an internal piston/seal and can be fed with pressure
from both ends which will cause the rod to move as the pressure rises
behind the piston. So, you may be conversant with the term
'For every action there is an equal and opposite
reaction'. What if we centre the rod and use two plugs to
seal the IN/OUT Ports on either end of the cylinder... Hmmm.
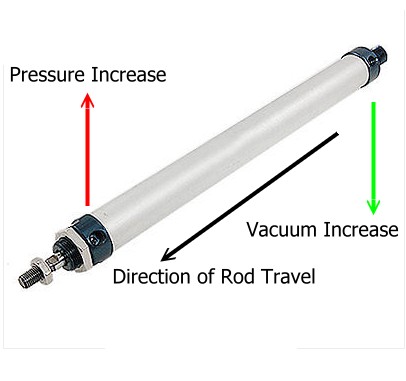
Well if you push the rod in one direction, it create a pressure in
that end of the cylinder and a vacuum in the other end. When released,
the pressure will push the piston back and the vacuum will suck
it. It then follows that whichever way you push or pull
the rod, the same rule applies, pressure in one end and vacuum in the
other and a centreing will result when released.
Got to make a prototype and see how it works. Bigger the bore of
the cylinder, the more pressure/vacuum and the more force.
The other variable I see is that I will need to use a cylinder which
will use up as much of the stroke as possible. Watch this space.
 12/04/2014
Saturday, another visitor Carl Sanders from Runcorn was in on a
'covert' visit organised by his partner for his birthday.
Another very enthusiastic visitor who wanted to hand fly as much as
possible on his way from Manchester to Alicante. He was
amazed that us chaps build thing like this in our homes and wants to
come back again, so I guess he had a good time :o) 12/04/2014
Saturday, another visitor Carl Sanders from Runcorn was in on a
'covert' visit organised by his partner for his birthday.
Another very enthusiastic visitor who wanted to hand fly as much as
possible on his way from Manchester to Alicante. He was
amazed that us chaps build thing like this in our homes and wants to
come back again, so I guess he had a good time :o)
09/04/2014
Never rains, but it pours. What a shit year 2014 has been so
far. Sadly third week of February we lost our best friend
AMBER which totally devastated the Bride. Staffy crossbreed,
real smart dog and a real character. Part of our lives for 14
years. So having to be supportive of the wife.
And then f**k me my father in law has his 3rd stroke which has left
him    hospitalised.
So our time has been spent dashing back and forth to Chester
for the past 7 weeks. But Spring is here
and with the weather warming up, enthusiasm is starting to return and
visitors are starting to come in. hospitalised.
So our time has been spent dashing back and forth to Chester
for the past 7 weeks. But Spring is here
and with the weather warming up, enthusiasm is starting to return and
visitors are starting to come in.
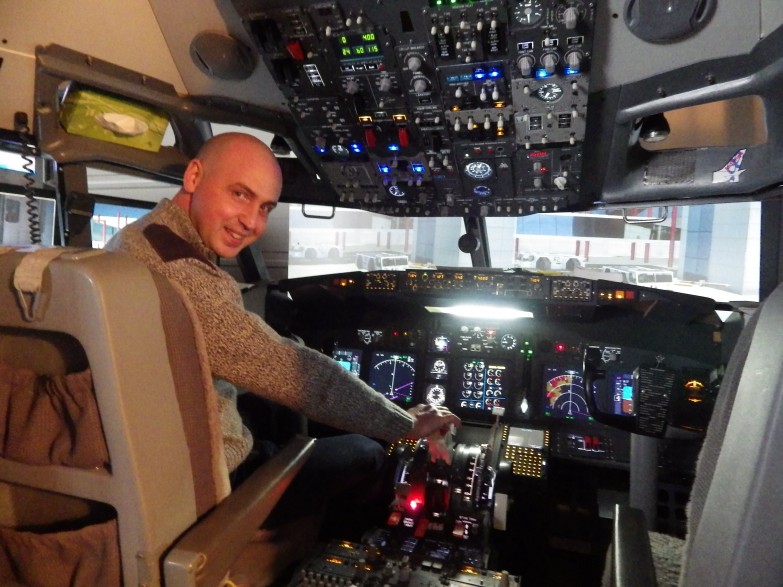
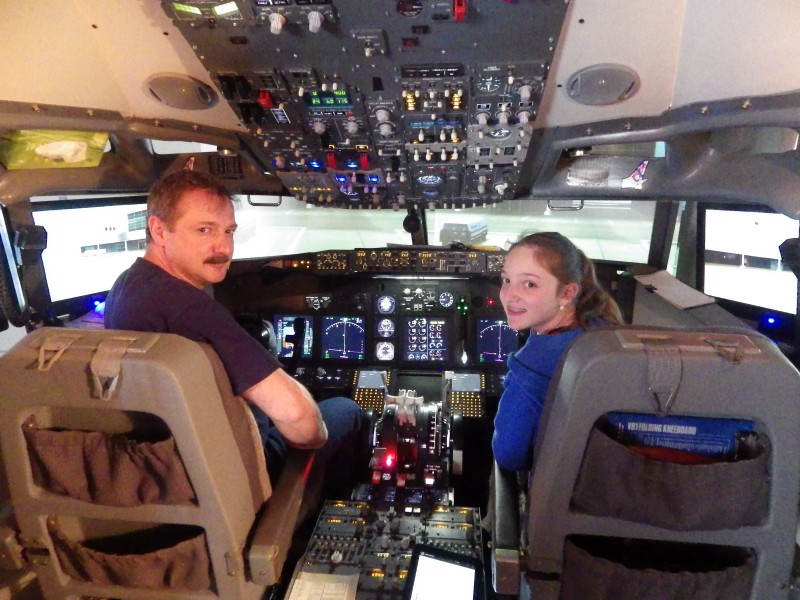
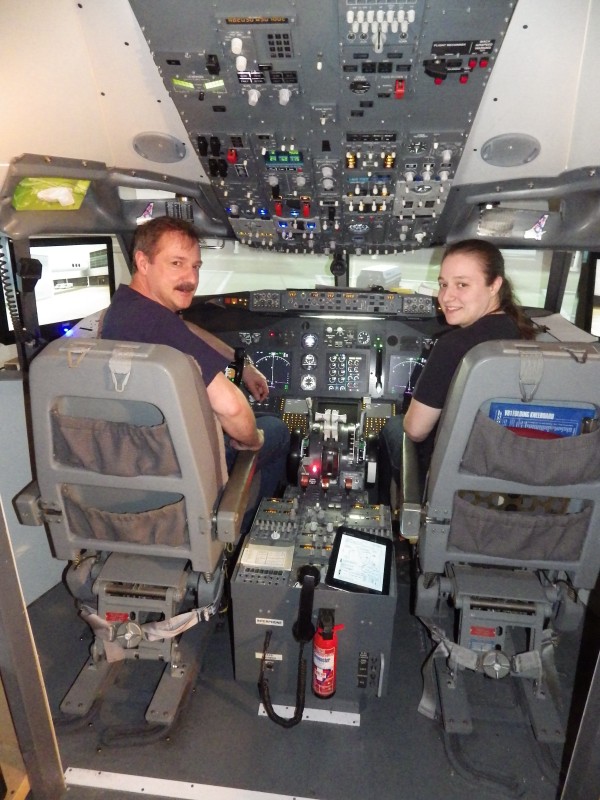
Highlight this week was Warren (FSAVIATOR) Soeldner was here with his
daughters who fitted in a visit to Oswestry on their Lightning Tour of
the UK. Originally from Colorado, Warren is in the Military and
is stationed in Germany right now. So we did a Frankfurt
to Gatwick route with a missed approach so he could hand fly it round
the circuit for a 'Greaser' of a landing 26L. Lovely
people, enjoyed their visit and I hope it wont be the last we see of
them.
 24/02/2014
Just no time for anything lately. I have been so busy for over a
year on projects for other people that sadly my own cockpit is 1. not
getting used like it should and 2. not getting the attention it
deserves. Aha, but all that's changed :o) I now have
a clear workbench and I'm not taking on any more until the summer. 24/02/2014
Just no time for anything lately. I have been so busy for over a
year on projects for other people that sadly my own cockpit is 1. not
getting used like it should and 2. not getting the attention it
deserves. Aha, but all that's changed :o) I now have
a clear workbench and I'm not taking on any more until the summer.

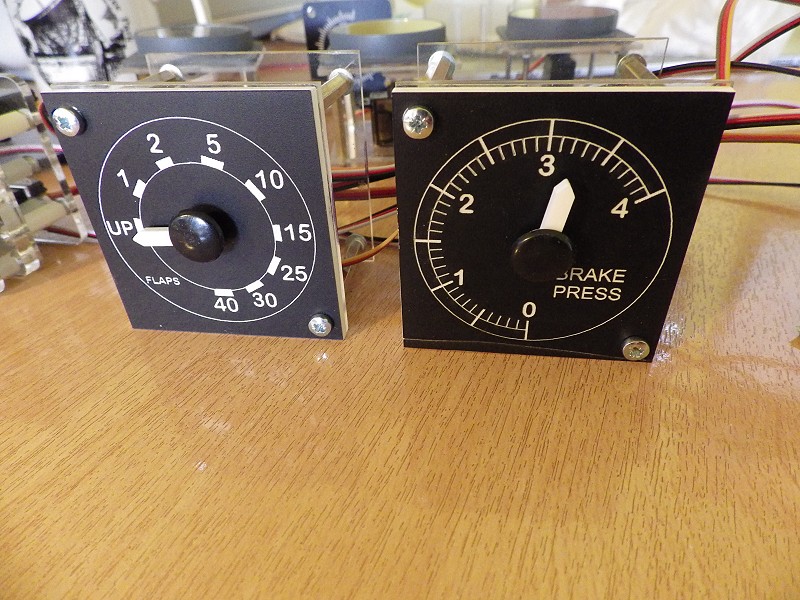
So,
what do you do with time on your hands? Disappear into the
workshop and start 'pissing about', that's what you do.
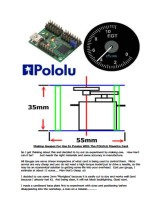
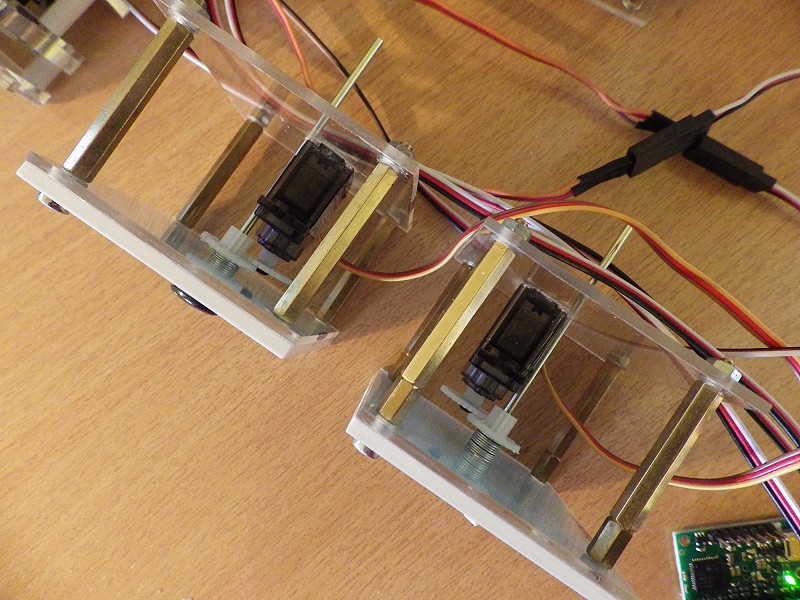
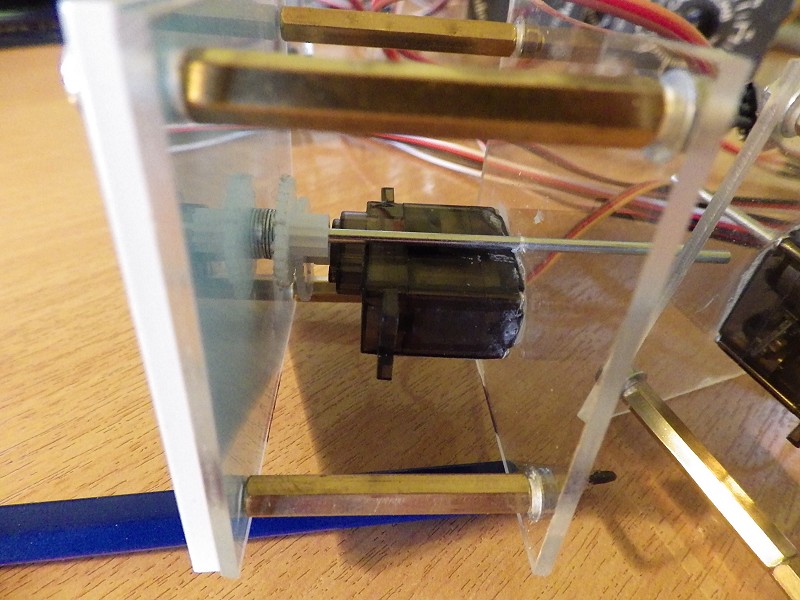
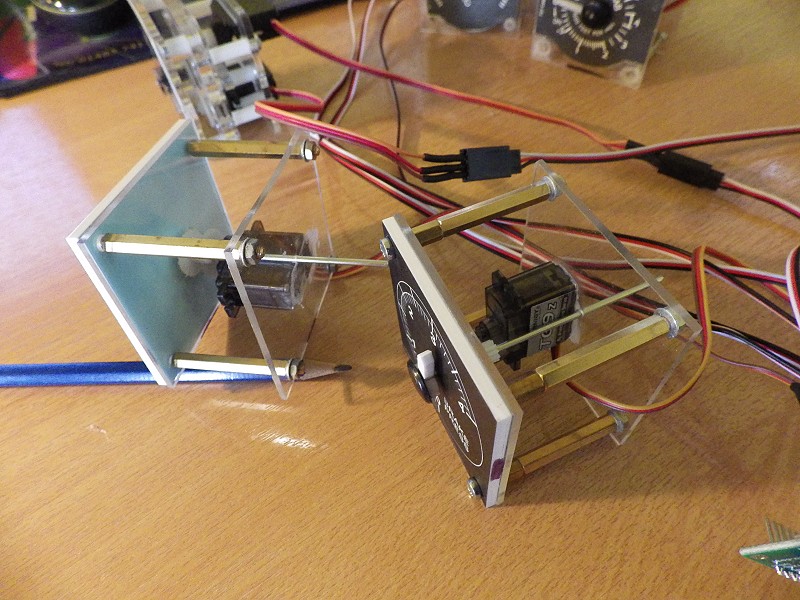
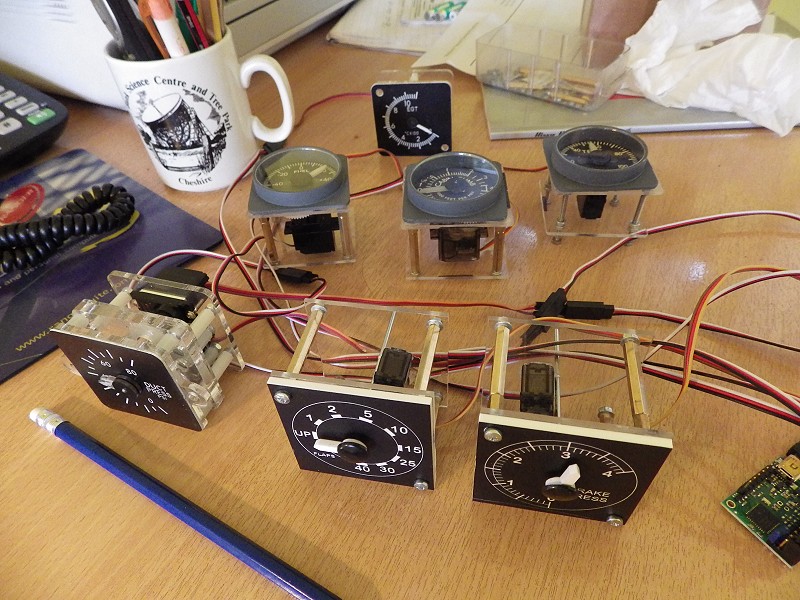
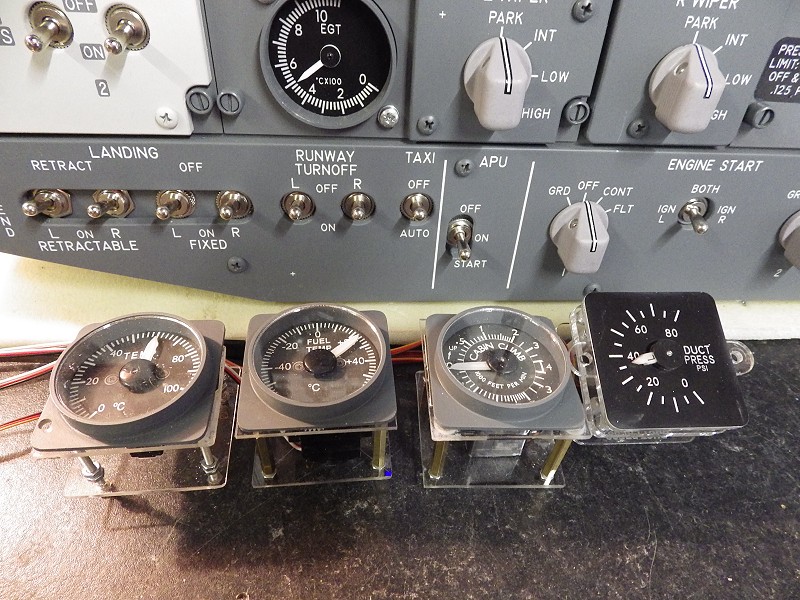
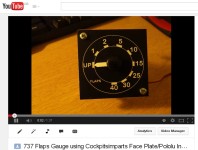
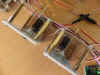
The idea of the gauges got me thinking. After making the Prototypes, I
bought a couple of proper engraved gauge plates off Sam
at Cockpitsimparts and 'Way To Go'. Just using
the basic idea. The .pdf 'How To' file is HERE.
Just click on the You Tube Image to see how smooth and accurate
the end result is - HAPPY DAYS.
 So,
we've got the whole 'Shooting Works'. Now All I've got to do now
is find the time to get on with all my upgrades. By the way, the
2013 News Page is HERE NOW So,
we've got the whole 'Shooting Works'. Now All I've got to do now
is find the time to get on with all my upgrades. By the way, the
2013 News Page is HERE NOW
   25/01/2014
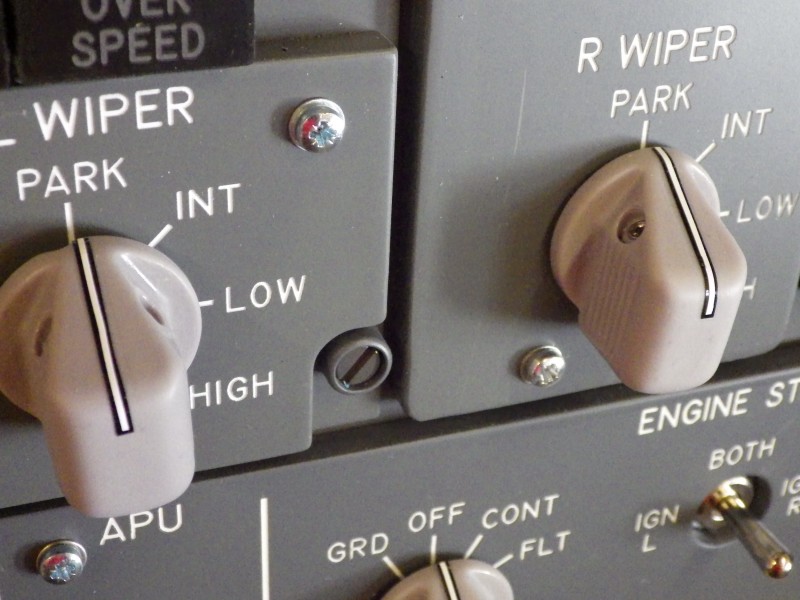
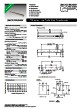
Maybe of some use to somebody.....
Having being building overheads for over a year now, I have come
across several avenues of supply for those 'awkward' to find
switches. First up is the 45 degree rotary (C&K Part No. A12505RNZQ).
Geremy from GLB
was here recently and he's told me he is now stocking these. Very
hard to find, the 90 degree rotary for the Crossfeed (ALPHA Part No. SR2613F-104).
MOUSER have
them. And as a bonus, I found 737 Type Toggle Switches
being made by Honeywell. Click the Datasheet Image for more
information. 25/01/2014
Maybe of some use to somebody.....
Having being building overheads for over a year now, I have come
across several avenues of supply for those 'awkward' to find
switches. First up is the 45 degree rotary (C&K Part No. A12505RNZQ).
Geremy from GLB
was here recently and he's told me he is now stocking these. Very
hard to find, the 90 degree rotary for the Crossfeed (ALPHA Part No. SR2613F-104).
MOUSER have
them. And as a bonus, I found 737 Type Toggle Switches
being made by Honeywell. Click the Datasheet Image for more
information.
 07/01/2014
Right, another successful & extremely
busy year in 2013, yes sir. My Thanks to everybody who came over
to fly the sim a total 41 visitors in 2013. I just dont know
where I find the time :o) Interested in Cockpit Building
or Just want to see what it's all about, drop me a mail and we'll see
what we can do to get you a flight. 07/01/2014
Right, another successful & extremely
busy year in 2013, yes sir. My Thanks to everybody who came over
to fly the sim a total 41 visitors in 2013. I just dont know
where I find the time :o) Interested in Cockpit Building
or Just want to see what it's all about, drop me a mail and we'll see
what we can do to get you a flight.


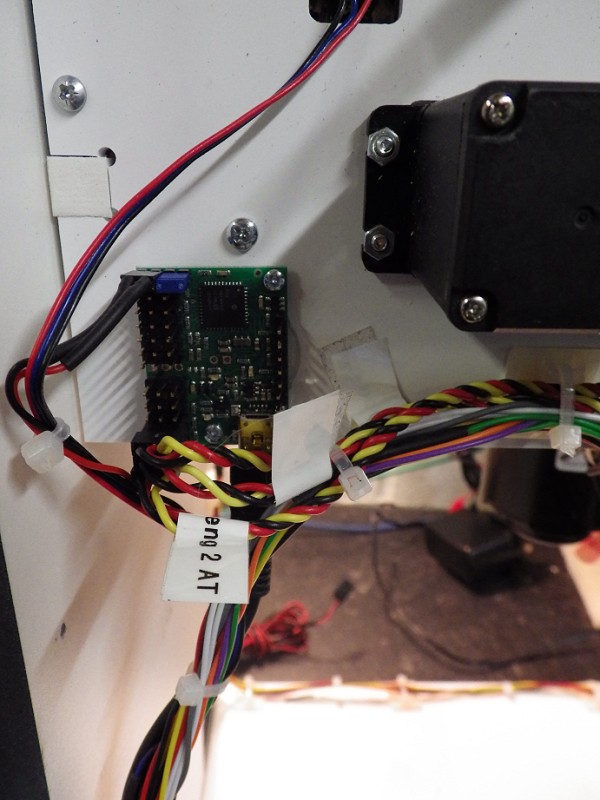
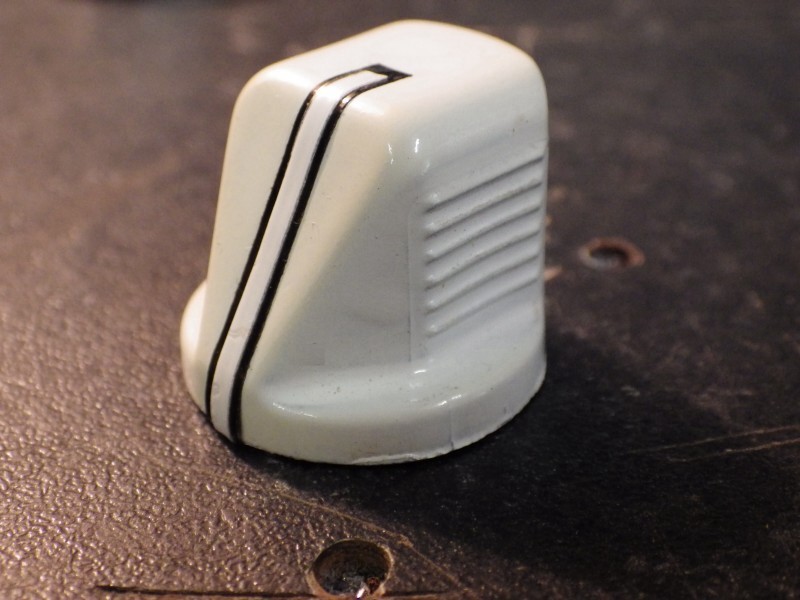
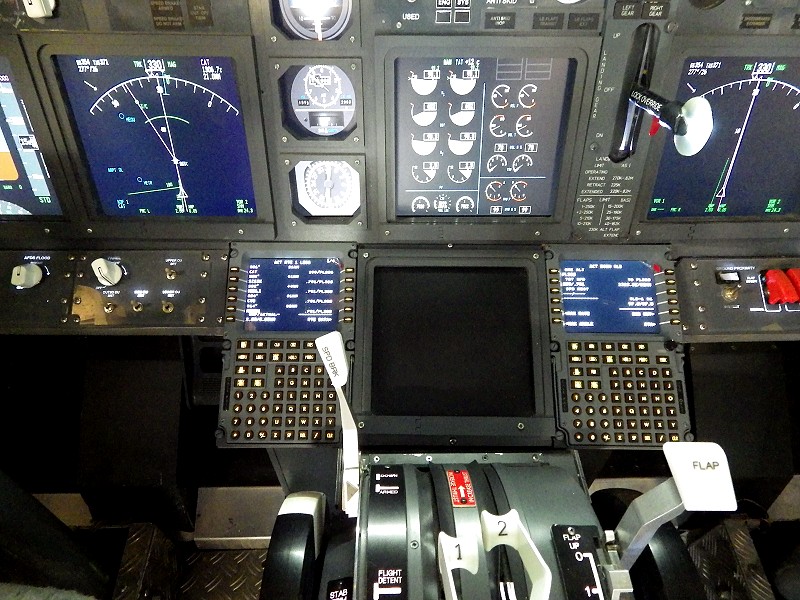
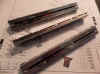
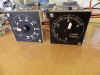
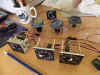
      We
learned to make gauges and drive them in Prosim with the POLOLU
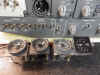
Maestro card. We refurbished and replaced all of the knobs in
the pit. Installed 2 x FDS CDU's in the sim which I can only
describe as awesome. But I've been sidetracked over the last 12
months by Panel Building for colleagues. Total for the
year is 7 forward and 4 rear overhead panels and I've just got
another arrive. The other thing we've been doing is
getting servo driven Poldragonet TQ's Running in Prosim using the
Pololu card. They work quite well actually. I've had 3 in
recently and all converted fine. Just a little bit of
'playing around' with the sliders in Prosim for the lever positions,
but once you get that right, a very acceptable performance. We
learned to make gauges and drive them in Prosim with the POLOLU
Maestro card. We refurbished and replaced all of the knobs in
the pit. Installed 2 x FDS CDU's in the sim which I can only
describe as awesome. But I've been sidetracked over the last 12
months by Panel Building for colleagues. Total for the
year is 7 forward and 4 rear overhead panels and I've just got
another arrive. The other thing we've been doing is
getting servo driven Poldragonet TQ's Running in Prosim using the
Pololu card. They work quite well actually. I've had 3 in
recently and all converted fine. Just a little bit of
'playing around' with the sliders in Prosim for the lever positions,
but once you get that right, a very acceptable performance.
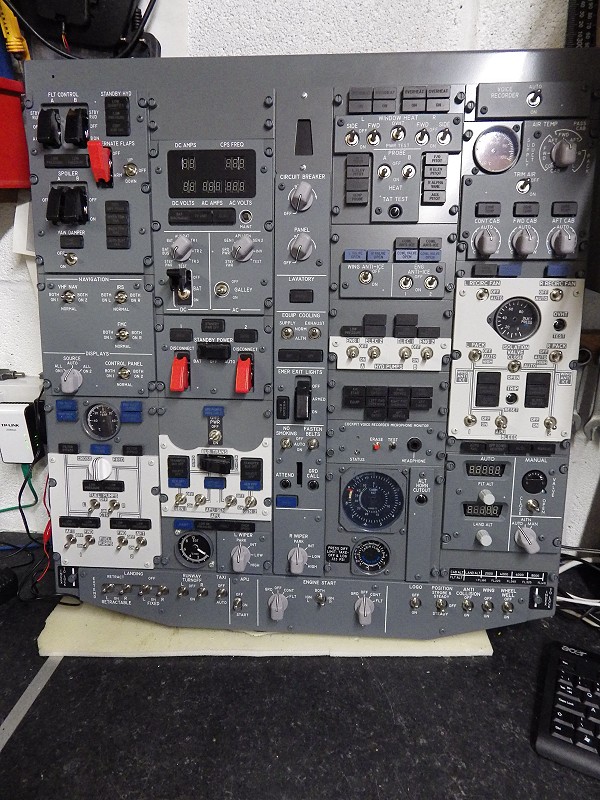
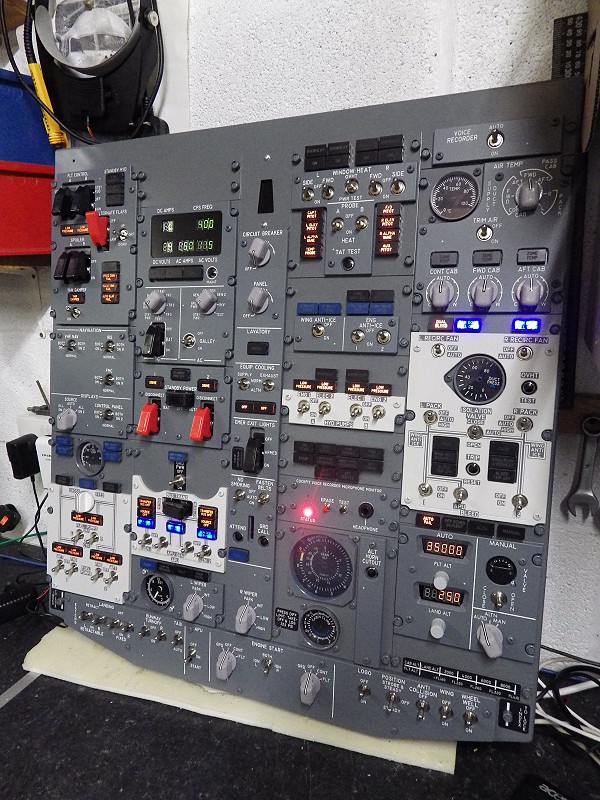
 22/12/2013
Right, Overhead and TQ gone from the
workshop, so I've now had chance to Detail Andrew Pringle's Overhead
he has FOR SALE. Please contact Andrew pringleno1@hotmail.com
for Pricing and Availability. All The details are
contained within the .pdf file. Click the image on the
right for more info. 22/12/2013
Right, Overhead and TQ gone from the
workshop, so I've now had chance to Detail Andrew Pringle's Overhead
he has FOR SALE. Please contact Andrew pringleno1@hotmail.com
for Pricing and Availability. All The details are
contained within the .pdf file. Click the image on the
right for more info.


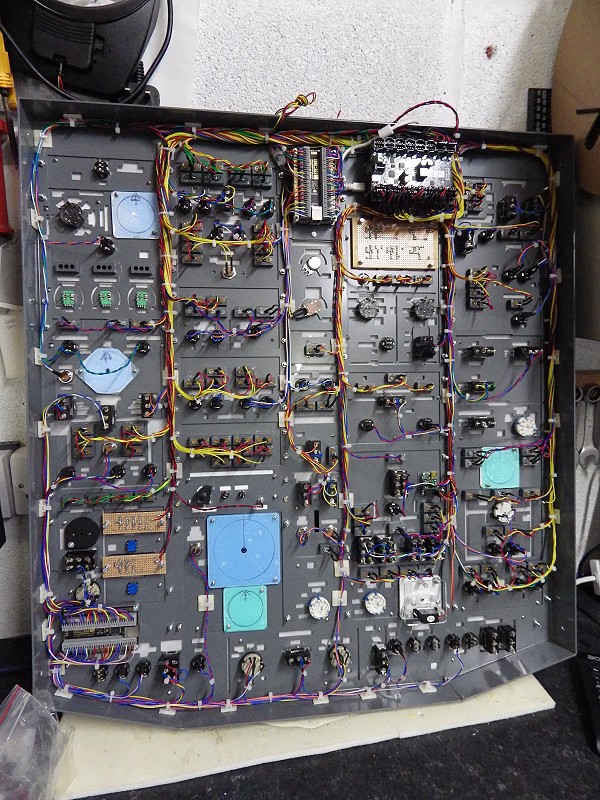
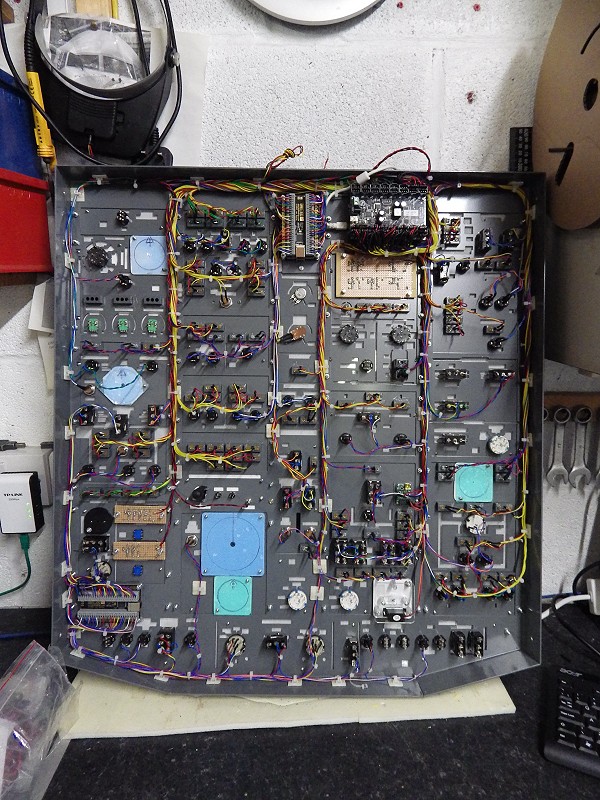
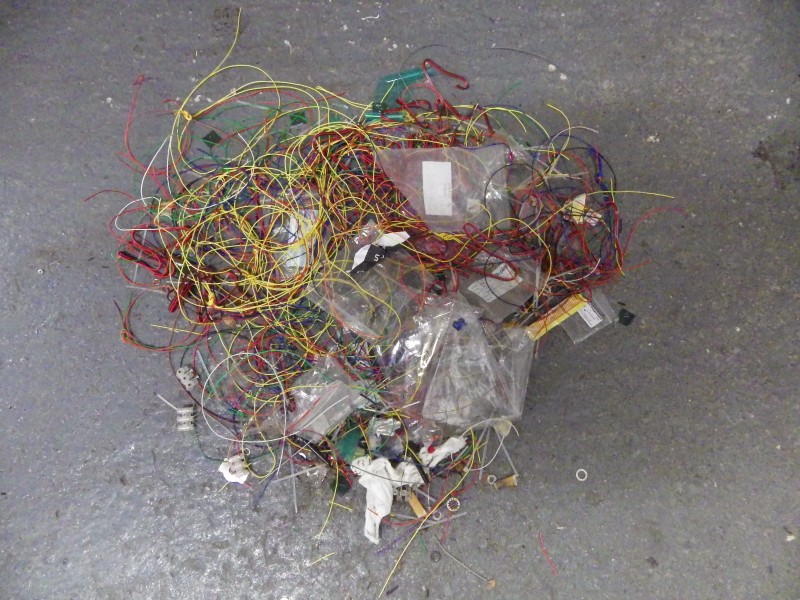
  09/12/2013
Past
two weeks I've had another overhead in
for wiring and I've still got two more to do. But I was falling
about yesterday because my wife cant get her head round how one little
boy can make so much mess. She reckons it's a skill I
have, a talent even. 09/12/2013
Past
two weeks I've had another overhead in
for wiring and I've still got two more to do. But I was falling
about yesterday because my wife cant get her head round how one little
boy can make so much mess. She reckons it's a skill I
have, a talent even.
07/12/2013
Well whats
this then :o) My old matey
Steve Everson has finally got up and running with his new
venture. This has been 2 years in the making. I remember
talking to Steve at Lelystad where he was very enthusiastic about
setting up his new company.
Based in Stackstead Nr. Manchester, it now gives us 'Northern Types'
the chance to experience a Sim. He's doing
Corporate, Stag Parties, One on One and all sorts of fun stuff.
Click on the image for more Info.

The
2013 News Page is Now HERE
|


 HOME
HOME